MacCafé Documentation
Versions 3.02.2 (4D17) / 3.02.3 (4D18) "tarrazu" • Updated on July 14, 2024
IN BRIEF: WHAT’S NEW IN VERSIONS 3.02.2 (4D17) AND 3.02.3 (4D18)
- Fixed a bug in 4D18 versions that made it difficult to edit the Subject and Reply-To fields in the Compose window (3.02.3, 4D18 only)
- Fixed a bug in the display of the Newsgroups field: MacCafé did not correctly detect the presence of duplicates in this field. (3.02.2)
- URLs of type macappstores:// are now supported by MacCafé. (3.02.2)
- Fixed a serious bug that made the Edit menu unusable in certain circumstances. (3.02.1)
- Fixed the incorrect display of the age of messages published the day before they were viewed. (3.02.1)
- Improved the visual appearance of the Reply formulas and Signatures lists: they now use a monospace font. (3.02.1)
- In the search field of the Newsgroups List, the last test used (Starts with / Contains / Ends with) is now stored. (3.02.1)
- MacCafé is now available in French and English! (3.02)
- Multilingual spell check, not limited to French and English. (3.02)
- Support of the .jpeg extension in URLs pointing to an image. (3.02)
- Added Martian Mono and Comic Mono in the list of supported monospace fonts. (3.02)
- Several bug fixes. (all versions)
Foreword
I decided to develop MacCafé for my personal needs after MacSOUP failed to work with versions of macOS that no longer support 32-bit applications (Catalina and later versions).
As a long-time MacSOUP user, having tested few other newsreaders, but not having seen or heard of readers offering a graphical representation of threads, I decided to try to create one.
My aim was not to create a 'MacSOUP like', but an application offering what I consider to be MacSOUP's strong point, namely the graphical representation of threads, as well as what I think MacSOUP lacks the most: the ability to open two (and more) message windows simultaneously, from the same or another group.
There are also other features missing from MacSOUP that I found the idea of in some of the messages from various people.
One final note: this application is limited to processing text messages. Binary files cannot be processed.
MacCafé was created using the 4D language (https://us.4d.com) because, in my opinion, a newsreader of this kind can be considered as a database, and because I would have been unable of completing such a project in Objective-C or Swift.
The result is an application that looks like any other Mac application, MacCafé.app which is a package containing a number of files and folders. There are two disadvantages inherent in the choice of 4D: the application is inevitably very heavy regardless of the complexity of the code, and when you quit the application, a 4D advertising window appears on the screen for about 5 seconds. It's not really invasive, but you can make it disappear by clicking on it.
G.O.
Editor's notes
• Some passages in this documentation, such as this paragraph, are shown in blue. These are the new features of version 3.02.
• Expressions underlined with green dotted lines are explained in a tooltip that appears when the mouse pointer is hovered over them.
• The symbol indicates a link to a web page external to the documentation. Links without a symbol are internal links, i.e. they point to a section of the documentation.
1. Introducing MacCafé
MacCafé is a multi-profile newsreader. This means that you may create several profiles. When in use, you work on the profile of your choice from among all those you have created. The minimum number of profiles is 1, and there is no limit to the number of possible profiles.
Each profile is characterised by a news server and the newsgroups available on that server to which you have subscribed.
You may create several profiles with the same server, and have the same group on several profiles with or without the same server.
Messages from the same group existing on several profiles (with or without the same server) are mutualised and you have access to all the messages for all the profiles to which you are subscribed. This means that in the event of a server failure, you can create another profile with a backup server and, whatever the retention rate of the backup server, have access to all your messages in memory for this group.
Note that apart from the server-specific preferences, all other preferences are common to all profiles.
The position of the windows is memorised, so you can find your settings again and again.
Help is integrated into most windows and is displayed by clicking on the button at the top right of the window. It shows the keyboard shortcuts available, the actions available when these do not have a dedicated button, and any help that seems useful.
2. Installation and startup
If you are installing MacCafé for the first time, we recommend that you read the pages in this section carefully and follow the instructions step by step, especially if you want to retrieve messages saved in MacSOUP.
2.01. Install application
1ᵒ First installation
Copy the MacCafé.app application to the /Applications folder (this location is particularly important if you're using a Mac on which macOS Catalina (or later) is installed.
Run MacCafé.
As the application is not signed, you may need to use a special procedure to launch it for the first time, depending on your security settings. For more details, see the following web page:
https://support.apple.com/en-us/HT202491
Create a database
On first launch, the application will not find a database to use and will ask you to open or create one. You must, of course, choose to create one. By default, in the choice window, it will suggest that you create it in its own package.
Do not choose this location, program updates would be complicated.
The database is made up of several files, so you must create a folder. You can name this folder as you wish and create it in the location of your choice (user folder — 'home' folder on your internal drive — or external writable drive). Be careful though: do not choose a location automatically synchronized by a third-party application (case of folders transferred to iCloud, for example).
The name proposed by default for the database is MacCafé, but you can enter another one.
In the end, your folder will receive at least 3 files containing the data and your MacCafé settings:
- [Database name].4DD
- [Database name].4Dindx
- [Database name].Match
Later, if you need to, you may create other databases, using the methods presented in chapters 5. Main menu and 8. Launch options. For optimum use, make sure they have different names.
Once the database is created, MacCafé tries to determine in which language it should display the elements of its interface. If your system language is French or English, this language will be applied. If it is another language, a dialogue invites you to choose between French or English. Note : You will have the possibility to change the language later (see chapter 3.11 Language and spell check).
Finally, MacCafé generates a protection key and displays a dialog box allowing you to view and customise it. Read chapter 3.02. Message protection key for more information on the role of this key.
2ᵒ Updating the application
To install an update, simply replace the old version of MacCafé.app with the new one. The first time you launch MacCafé, it should automatically open the current database. If the application still asks you to open or create a database, choose Open and specify the path to the .4DD file for the database you wish to use.
If, in a database used by a version prior to 2.09 "moka", you have added a Reply-To field in the Add custom message header fields preferences and the email address contained in this field is invalid, an alert will be displayed when MacCafé is launched:

You'll need to either correct the address or delete the Reply-To field, otherwise the alert will reappear every time you launch MacCafé.
2.02. Create a profile and get newsgroups list
1ᵒ Create a profile
The first step is to create a profile with an accessible news server. To do this, open the preferences and create your first profile. You'll find full details of how to configure the Profile in the 'Profile' preferences chapter.

2ᵒ Get newsgroups list
Once your profile has been created, you now need to update the list of groups available on the server.
Choose Newsgroups List
instead of Profile ***********
and click on the Get groups button.
Normally the list of groups should be displayed.
3ᵒ What's next?
At this stage, you have two options:
• Import News archives from MacSOUP
If you are planning to retrieve data archived in MacSOUP, in order to access it in MacCafé, now is the time to do it. See the next chapter to find out how.
If you just want to test MacCafé before retrieving your messages from MacSOUP, once this test period is over, simply delete the three files in the folder created earlier (see the first installation procedure) to get a blank version of MacCafé. You can then repeat the installation process described in section 2.01. Installing the application, starting from the creating a database step.
• Suscribe to newsgroups
If you don't use MacSOUP or if you don't want to import your old data from MacSOUP, you can skip chapter 2.03 and start subscribing to the groups that interest you. The procedure is detailed in the 3.03. Newsgroups list chapter.
2.03. Import MacSOUP news archive
MacCafé lets you import newsgroup messages from MacSOUP databases.
Read before you start
• When to use the Import command?
We strongly advise you to import the groups you want before reading any messages. However, if messages have already been retrieved for an imported group, they will not be modified, but discussion threads containing articles from both the retrieval and the import will be split in two.
If you haven't imported all the groups you wanted, you can run the Import command again. In all cases, no data will be duplicated.
• Scope of importation
The import is performed in the selected profile. Remember that before launching the import, you must first have retrieved the list of groups available on the server. This will allow MacCafé to subscribe you automatically to all the groups to which you were subscribed in MacSOUP. If you have not done so, please refer to chapter 2.02. Create a profile and get newsgroups list.
1ᵒ Start import
Open the Preferences window and select Tools.
In the Import archives messages from MacSOUP section, click on the Import button.
2ᵒ Import procedure
There are two stages to the import process.
• The first step subscribes you to all the groups in the MacSOUP database. If a group is not available on the news server that you have set up, the group is still created, its update is suspended and an A pictogram indicates that it is absent from the server.
If you are no longer interested in certain groups, simply unsubscribe (via preferences) once the import is complete.
For this first step, you will be asked to specify the folder containing the MacSOUP files you need. This folder is named 'Incoming News' and is normally located at the same level as the MacSOUP application.
• The second step is to import the messages for each group.
The list of groups and the number of messages in each are displayed. You can import all at once, or group by group by double-clicking on one of the groups in the list or by selecting it and then clicking on the Import selected group button.
Once the group has been imported, it is removed from the list.
If you run the Import command a second time, the same groups will be proposed. There is no test to see which messages have already been imported, but importing a group a second time will have no effect (apart from taking time, as each message will be analysed but not added to the new database if it is already there).
Normally the number of messages rejected should be zero or low. Messages are rejected if they contain only the header without the message body, or if the analysis of the header does not allow certain mandatory information to be recovered.
The number of messages indicated for each group is indicative, it does not reflect the exact number of messages contained in the MacSOUP database and the number of imported messages is often less than this number. It is in fact derived from the number of messages in the 'headers&flags' files, which may contain references to deleted or purged messages, references which are necessary for the correct representation of the threads.
3. Preferences
Here you'll find the various settings and access to tools.
The preference panel displayed when the window is closed is saved, and the next time the preferences are called up this panel will be displayed.
This window is 'modal', meaning you need to close it to access MacCafé's other functions.
A Close button is present on all preference panels. In some panels, the changes made require validation; in this case, the Close button remains inactive until the changes have been saved or cancelled.
To access MacCafé Preferences:
– MacCafé menu Preferences
or
– shortcut ⌘ ,
or
– click on the  button
3.01. Profile (preferences)

1ᵒ Basic configuration
When you use MacCafé for the first time - or when you want to create a new profile - you will need to fill in the following items:
Profile name | ⇾ Enter a name of your choice to identify your profile.
Email address | ⇾ You may either enter an email address that belongs to you, or enter a dummy address.
Recommendations
• Even if you choose a dummy address, its syntax must be correct. When you click on the Save button, MacCafé will check the syntax of the address you have entered. If the address contains syntax errors, an alert will describe the first error encountered and the profile will not be saved. You will then need to correct the address and click Save again to run another check.
For more information about checking email addresses, see Appendix 7.
• If the address you enter is fake and/or does not belong to you, we strongly recommend that you end it with the .invalid domain.
• If you want people to be able to reply to you by email but are worried about your address being spammed, you can enter a dummy address and later place your real address in the Reply-To header field. (see the description of this field in chapter 3.04).
Pseudonym | ⇾ Choose a pseudonym of your choice.
Note: It may be useful to check, in the groups to which you subscribe, that another user is not using the same pseudonym as you, to avoid any possible misunderstandings.
Server address | ⇾ Enter the exact address of the server you have chosen.
If this server requires authentication, enter your username and password in the last two fields. Otherwise, leave these fields blank.
If necessary, the web pages below can help you find the server that suits you:
http://usenet-fr.yakakwatik.org/acces.html (page in French)
https://sybershock.com/#usenet (page in English with a wider choice of servers)
Port 119 - Standard ⇾ Choose the port you want to use.
119 (standard) is the port commonly used on all news servers. When you click on this item, the Encrypted connection box is automatically unchecked.
563 (secure) offers a secure connection using encryption on some servers (but not all). When you click on this item, the Encrypted connection box is automatically checked.
When you have finished configuring your profile, click Save.
After registration, we recommend checking the server configuration by clicking on Test server. The answers returned by the server will be displayed in the text box below the button, and will tell you if the configuration is correct or not. You must be connected to the internet to carry out this test, otherwise you will receive an error message.
Examples of correct configuration:
Server without authentication
Server with authentication

If the configuration is incorrect, there are two possible scenarios.
• The results area displays (sometimes after a MacCafé alert):
CONNECTION FAILURE - ERROR [nᵒ]
Possible causes are:
- an invalid server address;
- port 563 is unavailable on the server; in this case, choose port 119, save and test again.
• The results area displays:
481 Authentication failed.
The connection is successful, but authentication fails. Check the username and password you have entered.
Cancel aborts editing of the displayed profile.
Delete deletes the profile displayed. As this operation is irreversible, you will be asked to confirm.
Add creates a new profile.
Important note
If you have changed the server address in a profile which already contains group subscriptions, remember to update the newsgroups list as soon as you have saved the changes. In this way, MacCafé will be able to deal with the possible absence on the new server of groups to which you were subscribed on the old one.
2ᵒ Advanced configuration: choose a port other than 119 or 563
As we have seen, port 119 is the standard port for connections to news servers, so all servers offer it. Port 563 is used to secure the connection by encrypting the data transferred, but it is not always available.
Some servers offer other ports, which may or may not be secure. This can be used, for example, to bypass the blocking imposed by a firewall that would refuse connection to ports 119 and 563 reserved for the NNTP protocol. In some cases, these alternative ports can also be used to test experimental server functions. To find out the list of ports offered by a server, it is essential to consult any documentation provided on the server's website.
MacCafé lets you choose a port other than 119 or 563. To do this, simply enter the port number directly into the drop-down list. For example:
80
When you manually enter a port number, the Encrypted connection box becomes a clickable option. It is therefore up to you to choose the type of connection used by this port yourself: standard connection (uncheck the Encrypted connection option) or secure connection (check the Encrypted connection option). Here again, this information should be searched in the server documentation (the secure connection is generally referred to by one of the acronyms TLS, SSL or NNTPS).
Finally, after saving the configuration, you'll need to check it using the Test server button. If the connection fails (ERROR [nᵒ]), it is either because the port indicated is not available, or because the type of connection chosen (standard or secure) does not correspond to it.
If you want to return to port 119 or port 563, you can either click on the corresponding item in the drop-down list, or type 119 or 563 in the input field. In both cases, the Encrypted connection option will be set automatically.
3.02. Message protection key
1ᵒ Role of the protection key
• Your protection key gives you access to the Cancel and Supersede commands when you post a message of your own creation (see chapter 4.03 for a description of these commands). On the other hand, no other person using MacCafé will be able to cancel or replace your messages (nor will you be able to act on other people's messages).
• The key is used in the composition of the Cancel-Key and Cancel-Lock header fields generated by MacCafé (see Appendix 5. Cancel-Key and Cancel-Lock for further information on this subject).
Notes
Your protection key prohibits you from cancelling or replacing messages you have published:
• with other newsreaders,
• with a version of MacCafé prior to v.2.06.
If you have changed your pseudonym, you will be able to cancel or replace messages posted under your old pseudonym, provided of course that you have not also changed your key. On the other hand, the cancellation or replacement message will be posted under the pseudonym used in the message to be cancelled/replaced.
2ᵒ Creating and customising the key
A protection key is randomly generated by MacCafé in the following circumstances:
• when you update MacCafé from a version prior to v.2.06;
• when you launch MacCafé for the very first time and create your first database;
• when you open a database created in a previous version of MacCafé without a protection key;
• each time you create a new database.
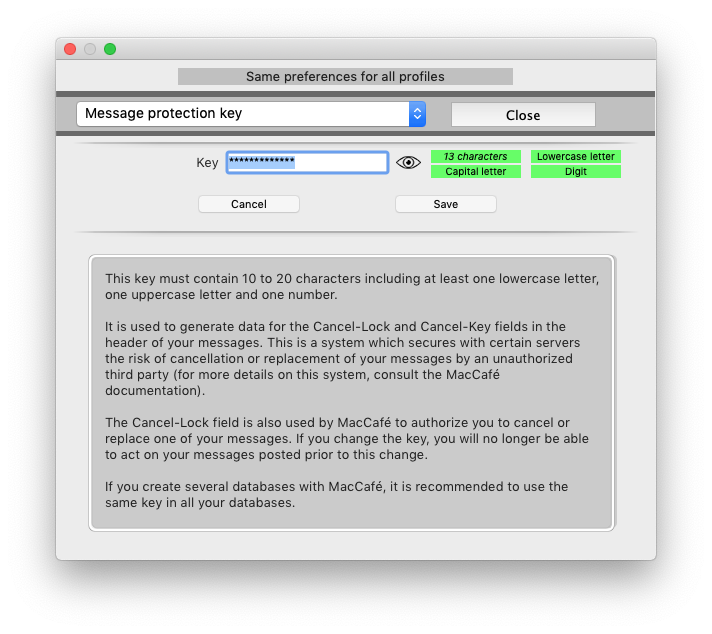
As soon as this random key has been created, MacCafé displays a dialog box (with the same information as in the image at the top of this chapter) which allows you to view this key and modify it immediately.
If this is your very first database, there is no harm in keeping the key generated by MacCafé, unless you want to customise it to your liking. If, on the contrary, you are already using another base, we strongly recommend that you replace this key with the one already in use in that other base. This will allow you to cancel or replace messages you have posted from the old database with the new one.
You can also change your key later, in the Message protection key Preferences described in this chapter. However, you should be aware that if you have already sent messages when you change your key, you will no longer be able to cancel or replace those old messages in MacCafé unless you restore the old key.
3.03. Newsgroups list

When a profile has just been created, the list of groups available on the server is empty. To retrieve the full list, click Get groups.
Once the list has been retrieved, the Newsgroup field allows you to search for the groups that interest you.
You can refine your search by choosing one of the rules from the drop-down list:
- Starts w/ ⇾ Search for groups whose name begins with the string you enter.
- Contains ⇾ Search for groups whose name contains the string entered (whatever its position in the name).
- Ends w/ ⇾ Search for groups whose name ends with the string you enter.
Notes
• The last rule used will be remembered for the next group search.
• You can use one or more wildcard characters (@) in the entered string. You will find in Appendix 8. Search and wildcards various examples of use of this wildcard.
To subscribe to a group, check the corresponding box in the Active column. To unsubscribe, uncheck the box (you will be asked to confirm).
Right-clicking on a group name brings up a context menu containing the command Articles available in [group name]. This command displays a small window which queries the server and indicates how many articles the group currently contains.
The S. (Status) column gives you the following information:
| M | The group is either moderated (articles subject to approval by a moderator) or self-moderated (see Appendix 4). |
| X | The server prohibits posting to this group: you can only access it in read-only mode. |
| No letter | You can post to this group without restriction. |
Note
The presence of the X mark may vary from one server to another. For example, some servers prohibit publication in the junk group, while others allow it.
Updating the Newsgroups list
As the list of newsgroups may change over time (groups added or deleted on the server, changes in the status of certain groups), the Get groups button allows you to update it at any time. At the end of the groups succession, if any changes have been made to the list, the panel below will be displayed over the list of groups:

The changes indicated in the Action column may be as follows:
| Added | The group has been added to the list. |
| Deleted | The group has been deleted from the list. If you have subscribed to this group, it will automatically be marked A (Absent) in tne Profile window, and fetching news from this group will be deactivated. |
| -> M | The group has moved to moderated status. |
| -> non M | The group has moved to non-moderated status. |
| -> X | The group has moved to post forbidden status. |
| -> non X | The group has moved to post allowed status. |
The Clear List button lets you reset the list of changes to zero.
If you click on Close without clearing the list, you can display it again by clicking on theChange log button at the top of the Newsgroups list windoow.
The next time the groups are changed, any new changes will be added to those still in the list.
About the local.* groups
Some servers offer a local.* hierarchy (local.general, local.test, etc) in their list. As its name suggests, this is a local hierarchy, meaning that the contents of local.* groups are in principle only accessible on the server that distributes them.
In versions of MacCafé prior to v.3.01, the local groups were not differentiated according to the server. For example, if you subscribed in one profile to the local.test group on the news.eternal-september.org server, and in another profile to the local.test group on the pasdenom.fr server, MacCafé displayed a local.test group containing all the messages posted on these two groups. You could therefore unknowingly post a reply on one server to a message that was not on that server because it had been published locally on the other server.
From version 3.01 onwards, each local.* group displays the content specific to its server and routing errors are no longer possible. To remove any ambiguity, the server name has been added to the group name wherever useful (in the banner at the top of windows or in group lists, except in the Newsgroups list preference), in this form:
local.test [news.eternal-september.org]
local.test [pasdenom.info]
3.04. Add custom message header fields

1ᵒ Additional predefined header fields
You can add header fields to the messages you publish. Some predefined headers are available in the Add drop-down list:
• Archive & X-No-Archive: These two header fields play the same role: they signal to the archiving sites that you do not wish your articles to be reproduced there. If this is your wish, it is advisable to add both headers, as archiving sites may respect one but ignore the other (note that this method offers no guarantee, as it is likely that some archiving sites respect neither). Here is the syntax for these two headers:
| Header field | Content |
|---|---|
| X-No-Archive | yes |
| Archive | no |
• Organization: an optional header field whose content is free. Some servers use it to add a formula of their own, but if you add it to your custom header fields, the content you enter will be displayed instead.
• Mail-Copies-To: if you have specified a real email address in your profile (From field in your messages) or in the optional Reply-To header, it may happen that someone replying to you on a group will email you a copy of that reply. If you do not wish to receive such copies by email, you can add the following header field:
| Header field | Content |
|---|---|
| Mail-Copies-To | nobody |
Please note: this ''Mail-Copies-To: nobody' field is not guaranteed to be respected either.
• Reply-To: this header field allows you to specify a reply-to address for your articles. When it is present, the address entered replaces the address you have indicated in your profile. This provides generally effective protection against spam. Here's how to use it:
In your profile, enter a dummy email address (preferably ending in .invalid).
In Add custom message header fields, add the Reply-To header field and enter an email address that belongs to you.
Caution!
If you don't intend to include a valid address, don't add this header field. There is also no point in adding it if you have already indicated your real address in your profile.
Checking the email address
When you click on the Save button after creating a Reply-To field, MacCafé checks the email address you have entered, to ensure that these elements are correct:
- the syntax of the email address,
- the existence of the email address domain (DNS test) and, if it exists, its compatibility with email exchange.
As the domain is verified online, your Reply-To field cannot be registered if you are not connected to the Internet.
If your address is rejected, MacCafé will display an alert containing a description of the first error encountered. Your Reply-To field will not be saved and will either have to be corrected or deleted.
For more details on checking email addresses, see Appendix 7.
2ᵒ Self-composed additional header fields
You can also enter your own header field. To do this:
double-click in the input field to display a new line:
enter the name of the header field and its content.
Restrictions
The Cancel and Supersedes header fields cannot be added manually. To cancel or replace one of your messages on the server, you can use the corresponding functions in the Message window.
You can't add the X-Face et Face fields manually either, as they are subject to special processing (see below).
Other fields are also prohibited, because they are generated either by MacCafé or by the news servers.
Important
It is recommended that you consult Appendix 4, where you will find important information on the main optional header fields in use on Usenet.
3ᵒ X-Face
The X-Face header field lets you attach a small image (black and white, 48x48 pixels) to your messages, which will be visible in newsreaders offering this feature.
To create your X-Face, you can either:
– Import an image from your computer, which MacCafé will automatically convert into an X-Face, displaying the code in the input box and displaying the resulting image (see text box below);
– Load a file containing the data for your X-Face (text in .XFC format, for example, converted by the GraphicConverter application, or text in .TXT format). The code will be automatically inserted in the input area, then converted to display the image;
– use an online converter such as this one:
http://www.dairiki.org/xface/xface.php
The converter will generate a code that you simply copy and paste into MacCafé's Data input box.
If the code is correct, the result will be displayed automatically to the left of the input field.
Tips on importing an X-Face
A wide range of formats can be imported: JPG, PNG, GIF, ICNS, PSD, SVG... as well as original Windows formats such as BMP or ICO, and even certain RAW formats generated by digital cameras or PDF format.
You can import an image regardless of its size or color depth. However, here are a few tips to help you get the best results::
• When you choose a rectangular image rather than a square one, MacCafé will warn you and ask you whether you want to keep the proportions of the image or not:
Do not keep ⇾ the image will be distorted to fill the square format of the X-Face.
Keep ⇾ the image will remain rectangular and will be displayed in X-Face with white margins. This is ideal for images showing a subject on a white background, as the margins are invisible and the subject is not distorted.
• Prefer a high-contrast image, which will suffer less from the conversion to black and white. The sharpest results will be obtained with images containing only black and white.
4ᵒ Face
Face is another header field used to identify you using an image, but this time in color. The Face field was designed to get around the black and white constraint imposed by the X-Face field, but it itself imposes other limitations, as we shall see later. Although they are less widely used than X-Faces, Faces are nevertheless supported by a number of newsreaders (including Pan, MesNews or Claws Mail... and now MacCafé).
To create a Face, click on Import an image file and choose your image.
Caution! This image must comply with the requirements detailed in the text box below.
Tips on importing a Face
The image you import to create your Face must:
1. be in PNG format;
2. measure exactly 48x48 pixels;
3. have a weight limit of approximately 725 bytes.
The weight constraint is linked to the maximum length accepted for the Face header field obtained after encoding the image, i.e. 998 characters. This corresponds roughly to a weight of 725 bytes. If you choose a file that is too large, MacCafé will warn you by displaying the resulting number of characters, and the import will be cancelled.
You'll soon realize that many PNG images, even if they only measure 48x48 pixels, are not smaller than 1 kb. So you'll need to choose your image carefully and play around with the PNG file saving options. Depending on the possibilities offered by the application used to process the image, we suggest that you:
deactivate interlacing;
reduce the number of colors to 16;
choose the maximum compression rate;
delete the image's metadata.
You can also automate the lightening of your image using an optimisation tool. The free, open source ImageOptim application, for example, is particularly effective.
5ᵒ Validation
To validate all the header fields (including X-Face and/or Face if you have created these fields), click Save.
3.05. Reply formulas and signatures
This preferences panel consists of two tabs: Reply formulas et Signatures.
When replying to a message, the presence of a reply formula before the text you are quoting is welcome, as it allows readers to immediately identify the person to whom you are replying.
A signature at the end of your messages is also recommended, especially if you want to add a URL to each of your messages (personal web page or other).
1ᵒ The Reply formulas tab

When you compose a message in response to another message, MacCafé can automatically add a reply formula above the text you are quoting.
To add a reply formula, click on the little ⊕ button and enter the formula in the line that is added.
To edit a reply formula, click on its text and make the changes. You can also navigate through your reply formulas using the shortcuts Tab and ⇧Tab.
To delete a reply formula, delete its contents.
To abandon any changes or deletions you have made, click Cancel.
To validate the changes or deletions, click Save.
Notes
• In your reply formulas, you can use the tags <date>, <time>, <name> and <mid>. When you write a reply, these tags will be respectively replaced by the date and time of sending of the message to which you are replying, the author's name or pseudonym and the Message-ID of this message. Examples:
On <date> at <time>, <name> wrote:
⇾ On 24 May 2022 at 11:22, Archibald wrote:
Written by <name> in the message <mid>:
⇾ Written by Archibald in the message <t6i84n$iml$1@moulinsart.be>:
The date display language and format will vary depending on the language and region settings chosen in your system preferences. (The example above applies to UK English.) For this reason, it may be wise not to use a formula with the <date> tag when posting to a newsgroup in a language other than your own.
Except in special cases, we recommend including at least the <name> tag.
• Formulas without tags will be reproduced as they are, without the slightest addition. Example of a tagless formula used when replying to one of your own messages:
I wrote:
• If you delete all the formulas from the list, the default formula below will be applied to your reply messages:
<name> wrote:
An alert message will inform you of this.
If you have saved several reply formulas, a drop-down list at the top of the Compose window will allow you to choose the one you wish to use. This choice is memorised for subsequent replies, until you choose another formula.
You can also let MacCafé randomly choose an reply formula from those you have created. To do this, check the Random choice box. If you check this option, avoid leaving formulas such as 'I wrote:' in the list, which in most cases would make no sense; it's better to use only formulas containing at least the <name> tag.
Note: It is possible to edit formulas in the preferences while the Compose window is open. Any changes will not be automatically applied to the message being written, but will be immediately available in the formula drop-down list at the top of the Compose window.
2ᵒ The Signatures tab

MacCafé can automatically add a signature to the end of your messages.
To add a signature, click on the small ⊕ button and enter the text in the 'New signature' input box.

The signature delimiter (consisting of two dashes followed by a space and a line break) must not be entered: MacCafé will insert it automatically if a signature is added to your messages.
To edit an existing signature, click on it and change the text in the 'Edit signature' input box.
To delete a signature, delete its contents.
To cancel any changes or deletions you have made, click on Cancel.
To confirm changes or deletions, click on Save.
As with the reply formulas, the signature can be selected when writing using a drop-down list, and here too the choice is saved until a new choice is made.
If you check the Random choice box, MacCafé will randomly choose a signature for each of your messages.
The proper use of signatures
On Usenet, the signature of a message is supposed to respect certain good practices:
– the signature text should not exceed four lines (i.e. a total of five lines including the delimiter);
– each line should be limited to a maximum of 80 characters.
If you save a signature that does not comply with at least one of the two recommendations above, MacCafé will display an alert. You will have the choice between Save anyway and Resume (in order to modify the signature).
To help you create a signature that complies with standard practice, counters have been placed under the 'New signature' input box (see image above). They show you in real time the number of characters on lines 1 to 4, as well as the total number of lines.
3.06. Display settings 1

1ᵒ Background and text colors in Message List
• Simple list mode ⇾ Sets the background color of the list when messages are not grouped into threads.
• Thread grouping mode / Alternate BG ⇾ Sets the two background colors of the list when messages are grouped in threads (these two alternating colors differentiate between threads).
• My color - Text / BG ⇾ Sets the text and background colors for displaying your own pseudonym in the list. The background can be colored or transparent (select the corresponding option).
Note: When the mouse pointer hovers over one of the colored boxes, a small window is displayed so you can see how your colored pseudonym will look against the three background colors: simple list, standard background and alternating background of grouped threads.
2ᵒ Message
• Zone BG - Thread / Header / Message ⇾ sets the background color of the different areas of the Message window.
• Text ⇾ Sets the text color of the Message area (excluding quotes and signature).
• Quotes — Levels 1 / 2 / 3 ⇾ Sets the text color of the first three quote levels.
If the quoted text contains more than three levels, the additional levels use the colors 1 / 2 / 3 in cycle.
• Reply formula and Signature ⇾ Adjusts the text color of reply formulas and signatures (including separator lines and/or delimiters). Note: The coloring of the reply formula is only an aid to writing your messages; in the Message (reading) windows, only the signature will take on the chosen color.
• Graphic thread ⇾ Display settings for the graphical representation of the thread (which is displayed above the message text).
– Line thickness ⇾ Sets the thickness of the tree structure lines.
– My color ⇾ Sets the color of the dots representing your own messages.
• Separators for edit zones ⇾ Lets you choose how the elements separating the three edit zones (formula, text, signature) in the Compose window. The separation between formula and text can take the form of a blank line of text (here marked 'invisible', the default option) or a continuous graphic line, while the separation between text and signature can consist of the standard signature delimiter '--' (the default option) or a continuous graphic line, giving you four possible combinations.
3ᵒ Fonts
You can choose the font and its size for the following three elements:
• The list of groups (Profile window).
• The list of articles (List window).
• The text of articles (Message, Compose and Pending messages windows).
For the text of articles, only the fonts with fixed width installed on your computer are proposed. The drop-down list takes into account the most commonly used fixed-width Unicode fonts. However, if you notice any gaps in this list, please report them to the fr.comp.sys.mac.communication group (in French) or the news.software.readers group (in English).
4ᵒ Misc.
• Show raw header in read mode ⇾ By default, the full header is not displayed above the message body. If you check this box, it will be displayed by default. In all cases, the H key toggles between the two display modes in the message reading window in the foreground.
Important note
If you reply to a message when the Show raw header in read mode option is active, the complete header of this message will be included in the quote. This may be useful in certain very specific cases (for example, to comment on the content of this header in a technical discussion group), but as a general rule, it will be useless and badly perceived by your interlocutors.
To avoid this, you can:
– either deactivate the display of the header before replying (H key),
– or select the part of the message that will be quoted before typing F to answer (see the Reply to message section in chapter 4.03).
• Number of characters per line 72 ⇾ Allows you to set the line breakdown in the Compose window. The limit values are 50 and 120 characters. The default value (72) is the one most commonly used (and recommended) on Usenet.
• Note to users of versions prior to v.3.02: The default spelling correction option has been moved to the new Language and Spell check preferences panel.
When writing a message, the number of characters per line can be changed. As this one-off change is not saved, it will only apply to this one message. When you compose another message, you will find again the value indicated in the preferences.
• Default values ⇾ This button cancels all the above settings and restores MacCafé's default values.
3.07. Display settings 2

1ᵒ Default display options for the message list
These options allow you to choose which settings will be applied by default to the list of messages from new groups to which you subscribe. They reproduce the options available in the List window.
• Show messages lets you choose which messages will be displayed: Unread, Read, All, Checked, New, Locked, Kill-filed, Ignored (all) ou Tagged (all).
You can choose not to display Ignored and/or Kill-filed messages.
If you check an option that contradicts the choice made in the list, for example:
- Show messages Kill-filed
et
- except Kill-filed
the checked option will be ignored. In our example, only kill-filed messages will be displayed.
• Display Age / Date of messages. Examples:
– Display Age ⇾ 22 d, 1 d 12 h 23 min…
– Display Date ⇾ 09/05/2020 (or 5/9/20, according to your regional settings), yesterday on 18:32:25…
• Group threads:
– If this option is checked, the messages will be grouped into threads, and you can choose the order in which the threads and their messages are arranged: None / Newest first / Oldest first.
– If the option is unchecked, the messages will not be grouped together, but will be ordered according to the column and direction you have chosen in:
Sorted column : Author, Lines, Age or Subject,
Newest first or Oldest first .
2ᵒ Resetting the message list display
The Reset button applies the above default settings to all the groups to which you are subscribed. This makes it possible to standardise the display of message lists, if certain settings have been modified for a particular group (bearing in mind that any modification to the display in a message list is memorised for the group concerned).
Note: If any List windows are open at the time of the reset, they will be closed.
3ᵒ Space bar rule for reading messages
This rule determines whether the next message opened with Space will be:
– the next checked message (default).
– the next unread message.
Note: Clicking on this setting will close any open List and Message windows.
3.08. dbFaces

The principle behind dbFaces is inherited from the MacSOUP newsreader. It consists of a database of 'self-portraits' (in fact, some dbFaces have nothing to do with a portrait) which were sent by MacSOUP users, each image having the author's pseudonym as its name. After downloading this database, MacSOUP automatically displays the dbFace of each person registered in the database.
This concept therefore differs from that of X-Faces (see section 3ᵒ of chapter 3.04) which are injected by the author into the header of his/her messages, and are thus visible in many newsreaders. On the other hand, the dbFaces, are only visible to MacSOUP... and now MacCafé users.
Note: The dbFaces database used by MacCafé is a encrypted file with the .dbface extension, which can be downloaded from the MacCafé website. It contains MacSOUP's 'historic' dbFaces from French-speaking users, as well as others recently added.
The Manage dbFaces... button opens the following pop-up menu:
Import from .dbface
Select the .dbface file (see text box above) you have copied to your disk, then click Open. The dbFaces are immediately installed in the MacCafé database.
Extract .dbface to a folder
This command will copy all the images included in the .dbface face to the folder of your choice. In particular, this will allow you to rename the images (in the event that a referenced author has changed pseudonym, or has several numbered dbFaces in his/her name).
In the first dialog box, select the .dbface file. In the second, select (or create) the folder of your choice.
When extraction is complete, a small message on a red background will briefly appear to let you know.
Import the contents of a folder
You can import all the images contained in the folder of your choice. When you run this command, any dbFaces stored in the database are deleted before the new images are imported.
In the dialog box, select your image folder and click Open.
Add the contents of a folder
This command adds images from the folder of your choice to the database, but any dbFaces already present are not deleted, except in the following case: if a new image has the same name as an old one, the new one replaces the old one.
In the dialog box, select your image folder and click Open.
Delete dbFaces from the database
This command deletes all the dbFaces stored in the database.
To quickly find an author in the list and display their dbFace, enter the first few letters of their pseudonym in the Pseudonym field.
A few tips
If you want to create a folder of custom dbFaces, make sure that the name of each image in the folder is the exact pseudonym of the author it is to represent, including upper/lower case, spaces, accented characters and full stops.
Many image formats are accepted. The dimensions of dbFaces are generally 96x96 pixels or 64x64 pixels. You can import or add larger images, but this is not recommended for a number of reasons:
- As they would be displayed as 96x96 pixel thumbnails anyway, large images would unnecessarily weigh down the MacCafé database.
- Scaling images on display can alter their legibility by producing artefacts.
- If the image is not square, it will appear cropped when displayed. Conversely, an image measuring 64x96 pixels, for example, will be displayed as is, without cropping or distortion, in MacCafé.
- It is therefore preferable to prepare your images before importing or adding them, by reducing their size in an image processing application, so that the largest dimension of the image to be imported/added is equal to 96 pixels. You can also achieve better results by reducing images in stages rather than all at once, and by adjusting the sharpness of the image at each stage.
3.09. Author filtering

The table lists the authors you have kill-filed. To kill-file an author, you must use the shortcut ⌘ K either from the list of messages in a group, or from reading a message from the author to be filtered. Author filtering is based on the complete From field (pseudonym + email address).
The checkboxes in the Delete column determine the filtering mode for each kill-filed author:
• The box is unchecked
⇾ Future messages from the author will be marked as read as soon as they are retrieved and will be given the P pictogram (P stands for 'Plonk') in the List windows, as well as in the graphical representation of the thread (Message windows).
• The box is checked
⇾ Future messages from the author will be deleted as soon as they are retrieved.
• Whether or not the box is checked
⇾ Messages from the kill-filed author already in the database are immediately marked with a P, and those that have not yet been read are marked as read.
To remove an author from this list - i.e. so that he or she is no longer filtered - use the Author search field to find his/her From in the list, then select him/her and click on Rehabilitate. You will be asked for confirmation.
When an author is rehabilitated:
⇾ his/her future messages will no longer be marked as read or deleted when fetching news;
⇾ The P mark is removed from his/her messages already stored in the database.
If you check the option Automatically check the 'Delete' box when adding an author, all authors you plonk via the ⌘ K will have their Delete box automatically checked.
The Check all and Uncheck all buttons allow you to activate or deactivate the deletion of future messages for all the authors on the list with a single click.
Important notes about the Delete option
• When you check the Delete box for a filtered author, as we have seen, their messages already in the database are not deleted. If you want to erase all traces of this author, you can delete his/her old messages using a purge script.
• When you uncheck a Delete box that was previously checked, or when you rehabilitate a filtered author whose Delete box was checked, the messages deleted from the author concerned are not recovered.
Another way to filter authors
The functionality presented in this chapter is an easy-to-use tool, but it has certain limitations, particularly because it requires multiple entries for 'undesirables' who often change their pseudonym. From version 3.0 onwards, MacCafé has a much more powerful feature: message filters. See chapter 4.12. Message filters for more details…
3.10. Search engines

1ᵒ WEB search engine
You can choose your preferred search engine from the drop-down list .
You can also enter the URL of a search engine that is not on the list, by filling in the Custom URL | input field. The protocol (http:// or https://) is required. Examples:
• Web search
- searXNG ⇾ https://searx.gnous.eu/search?q=
- Bing ⇾ https://www.bing.com/search?q=
• Dictionary search
- Wiktionnary ⇾ https://en.wiktionary.org/wiki/
When you right-click (or Ctrl + click) on a selection in a window containing a message (Message, 'Online' Message, Compose), the Search in […] item in the context menu will open your web browser to launch a search on this selection in the engine you have chosen.
2ᵒ Translator
Use this drop-down list to select an online translation site. You have two choices: Google Translation and DeepL.
When you right-click (or Ctrl + click) on a selection in a window containing a message (Message, 'Online' Message, Compose), the Translate with […] item in the context menu will open your web browser to launch the English translation of this selection on the website of your choice.
3ᵒ Online extension of search by M‑ID
These preferences concern the search for a message based on its Message-ID. This function, which can be accessed by various means, is described in detail in chapter 6. Search by Message-ID.
If the message you are looking for is not in the MacCafé database, the search can be extended:
– either to the server(s) used in your profiles,
– or to the archives available on a website (to be defined below),
– or to the server(s) and then, if necessary, to the web archive site.
• The Allow online searches option allows you to globally enable or disable online message searches. When unchecked, the search by M‑ID will only be carried out in the MacCafé database.
Unchecking this option does not change the status of the other options. To reactivate the online search:
- if at least one option is checked on the right, check the Allow online searches option;
– if the two options on the right are unchecked, check the one(s) you wish to activate.
• The NNTP Servers option allows you to extend the search to the server(s) you use.
The Order & Choice list displays the servers available in your profiles. You can choose which ones will be queried by checking them. You can also drag and drop to change the order in which servers should be queried. This list is displayed identically in the M‑ID search dialog box. See Chapter 6. Search by Message-ID for more details on this feature.
• The Archive website option allows you to extend the search to the website of your choice.
If this option is checked, two other options are available:
Open 'Online Message' ⇾ if the search results in the message being displayed in a Web Archive window, the same message is automatically duplicated in an 'Online' Message window.
And close 'Web Archive' ⇾ the above action closes the Web Archive window, so that only the 'Online' Message window remains displayed.
• In the Archive website used drop-down list, you can choose which web archive site to query when the Archive website option is checked

The Custom URL… item allows you to:
– either edit the URL currently displayed (which can be useful if you are aware of a change in the syntax used by the site for searching),
– or enter the URL of an archive site that is not on the list.
In all cases, make sure that the %mid expression (which represents the message-ID you are looking for) is placed in the right place in the URL, and that it is only surrounded by angle brackets if the site requires it.
Caution! You won't be able to leave the preferences panel if the URL entry field is empty while the Archive website option is checked. You will therefore have to choose between entering a URL (or selecting one of the predefined sites) and unchecking the option.
Features of the Howard Knight archiving website
Reference URL: http://al.howardknight.net/?MSGI=<%mid>
Howard Knight's site is a search engine that interrogates several large news servers, enabling it to cover a very wide range of Usenet hierarchies and to retrieve messages over a period of around twenty years.
Several links are available on the results page:
• Change language (German, English, French or Italian)
• View for Bookmarking: opens a new page containing the source code of the message, with a handy shortened URL if you want to publish it on Usenet.
• Lookup another Usenet article: opens the service home page, with an input field for another M‑ID. Caution! Angle brackets are required.
Very long articles (for example, certain charters or FAQs published regularly) may appear truncated on this archive site. This results in the following warning being displayed at the bottom of the page: REMAINDER OF ARTICLE TRUNCATED.
3.11. Language and spell check

1° Spell check
From version 3.02, MacCafé offers multilingual spell checking. For this purpose, the table contains all the dictionaries available on your system.
The Active column allows you to select the dictionary that will be active by default, i.e. the one that will be used when the Compose window is opened. If you change the dictionary while composing, the one you choose will become the new active dictionary, and the change will be reflected in this column.
Note : When you launch version 3.02 for the first time, your system language dictionary is declared active.
The Kept column allows you to choose which dictionaries you want to be able to use when writing your messages. In the Compose window, you will have access to a list of dictionaries in which only the dictionaries chosen here will be displayed.
Finally, the Spell check by default option determines whether spell check should be enabled or disabled by default when composing messages. Note that in addition to this global setting, you have an option in the Compose window allowing you to occasionally enable or disable spell checking, only for the message currently being written.
Notes
• If you deselect the currently active dictionary, spell checking can no longer be enabled. To be able to reactivate it, you must activate another dictionary among those you have selected.
• Likewise, if you deselect all dictionaries in the Kept column, spelling correction will be disabled.
In the list, the item “English” (without mention of region) corresponds to United States English.
• How spelling correction works is detailed in section 5° of chapter 4.04.
2ᵒ MacCafé language
If you wish to change the display language of MacCafé (which, remember, was defined when you first installed or updated MacCafé), the Language drop-down list in the Language and spell check preferences allows you to do this, and your choice will be remembered. The language change will be effective the next time MacCafé is launched. You can relaunch it immediately by clicking on the Restart button which appears at the same time as the alert banner.
Notes
• The language change also applies to MacCafé documentation.
• Regardless of the language chosen, several elements will always adopt the system language:
- alerts or dialogs generated by 4D (and not by MacCafé)
- dates, including their format (depending on your regional settings)
- menu items generated by macOS.
3.12. Message retrieval

1ᵒ At the end of message retrieval
In the Sound played if new messages are loaded list, you can choose the system sound that will be played at the end of the retrieval if MacCafé has loaded new messages. For no sound to be played, choose Silence.
2ᵒ Automatic message retrieval
If you want MacCafé to regularly check the news server for new messages, check the option Enable automatic retrieval and specify the desired interval between two retrievals (in minutes) in the Time between 2 retrievals | field.
Once automatic retrieval has been enabled, you can create exceptions. By checking the option: Exception for active profile… - No auto retrieval , you will disable automatic retrieval only for the active profile.
To create another exception, close the Preferences window, switch to the relevant profile, then reopen the Preferences window and repeat the operation.
Caution! If you uncheck the Enable automatic retrieval option and reactivate it later, you will have to recreate your exceptions, as the settings will be lost.
Caution (bis)! For automatic retrieval to work, at least one profile must not be treated as an exception. So, when you have checked Enable automatic retrieval , if you checkException for active profile… - Do not retrieve in all your profiles, automatic retrieval will be disabled (the box will automatically uncheck).
When you launch MacCafé, if automatic retrieval is enabled for the profile that is displayed (i.e. if it is not one of the exceptions, see above), a first retrieval will be performed automatically, and subsequent retrievals will be timed to this first retrieval, according to the time interval you have defined. Similarly, when you change profile and the new profile displayed is affected by automatic retrieval, the first retrieval is performed immediately and subsequent retrievals are scheduled according to this first retrieval.
When automatic retrieval is enabled for the active profile, manual retrieval (via the retrieve button in the profile window) is still possible.
During automatic retrieval, only the groups in the active profile are checked for new messages (except, of course, those for which message retrieval has been disabled). Groups present in other profiles but not in the active profile are not affected.
You can prevent the automatic retrieval that normally starts when MacCafé is opened. To do this, press a ⇧ key while launching MacCafé and hold it down until the contents of the Profile window are displayed. This will delay the initial retrieval by n minutes, depending on how long you have chosen in Preferences. This will give you time to make any adjustments (for example, disabling retrieval for a group or disabling automatic retrieval for the active profile).
3ᵒ Action on the settings for retrieving your own messages
The following two settings can be automatically assigned to messages you have posted yourself, as soon as MacCafé retrieves them from the server:
• Auto-check ⇾ The branches of the thread replying to your messages will be auto-checked.
• Mark as read ⇾ Your messages will automatically be marked as read.
4° Number of messages triggering an alert during retrieval from a group
• This function allows you to prevent MacCafé from systematically retrieving all the messages in a group when their number exceeds the threshold you have set. Instead, MacCafé will alert you and let you choose how many messages you want to retrieve.
This can be useful in various cases: a group that has been flooded, a high-traffic group that you don't check very often, updating a database that hasn't been used for several months, etc.
The function is activated by checking the Activate function option. You can then change the alert threshold by editing the Number of messages 300 field.
The process used by this function depends on the type of retrieval you are performing.
1. Manual retrieval
When manually retrieving messages from a group, if the number of messages to be retrieved exceeds the set limit, MacCafé displays a dialog box similar to that for the first retrievals:
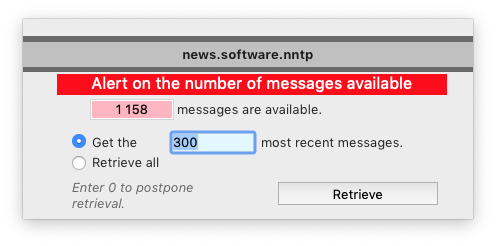
You can choose to retrieve either all messages or the n most recent messages. You can also postpone retrieval of the group until later by entering the number 0. In the latter case, the alert will be displayed again when you request a new message retrieval of the group.
2. Automatic retrieval
If you have activated automatic retrieval for the active profile, it is performed normally but ignores the group(s) whose number of messages to be retrieved exceeds the set limit. These groups are not checked, but stored in a waiting list, and the automatic retrieval indicator becomes a clickable red button
  .
.
Clicking on this red button (and not on the mailbox!) displays the following dialog box:

This lists the groups awaiting message retrieval, with the number of messages to be retrieved for each.
The Cancel button closes the dialog box, postponing processing of the groups in the waiting list.
The Retrieve button closes the dialog box and launches message retrieval for the groups in the waiting list. For each of them, a dialog of the same type as for manual retrieval is displayed:
If you enter 0, the group will not be checked and will remain in the waiting list. Otherwise, it will be removed from it at the end of the retrieval.
When retrieval is complete, if there are no pending groups, the clickable red button is replaced by the non clickable basic indicator.
Notes
• The waiting list is linked to the active profile, so if you change profile, you'll find a different waiting list, or no list at all.
• If you unsubscribe from a group on the waiting list, it will be removed, and if the list did not contain any other groups, the button will disappear.
• If you increase the threshold, this may have the effect of removing certain groups from the waiting list. Example: your initial setting was 300, and the waiting list for one of your profiles contains a group with 350 messages. If you set the threshold to 400, this group no longer has any place in the waiting list and is therefore logically removed from it.
Similarly, if there is a flood on a group, it is possible that between one auto retrieval and the next, the administrator has cleaned up the mess by cancelling the items concerned. If, following these cancellations, the number of messages to be retrieved no longer exceeds the limit, the messages in the group will be retrieved normally and the group will be removed from the list.
• When you disable automatic retrieval for a profile, the waiting list for that profile is automatically cleared.
• In addition, you can check the Use on first message retrieval of a group option. Normally, the very first message retrieval of a group is not affected by the alert function if the set limit is exceeded: whatever the number of messages to be retrieved, a dialogue is systematically displayed to allow you to choose the number of messages to be retrieved. If you check this option (and of course if the Activate function box is also checked), this dialogue will be displayed if, and only if, the number of messages available on the group exceeds the limit you have set.
For more details, see the text box FIRST MESSAGE RETRIEVAL OF A GROUP in chapter 4.01).
3.13. Last retrieved message number

1ᵒ Preamble
Each server maintains its own numbering for each message in each of the groups it distributes.
So, each time it receives a new message for a group (either from one of its users or from another server), it increments the number for that group by 1.
This number is found in the Xref field in the message header.
MacCafé uses this number to calculate the number of messages to read for each group. To do this, it stores the last message number read for each group, and for each profile.
2ᵒ How the command works
This command is used to modify the last message number read for each subscribed group for the current profile.
A new number can be entered for each group by clicking in the New box, after selecting the group line.
You can also, by clicking on the 0 everywhere button, set this number to 0 for all groups.
Once the changes have been made, you must Save or Cancel these changes before you can close this preference.
3ᵒ Purpose of this command
If you think that you have not received certain messages (due to a bug in MacCafé, for example, or something else...), the numbers of these messages are a priori lower than the last number recorded for the group. The only way to attempt to retrieve them is to modify the last message number found for the group in question.
To do this, you need to estimate the number of messages for this group since the first one went missing, then either subtract this number from the number shown in the Current column by a reasonable margin, or set the value to 0.
In the first case, the next retrieval will attempt to retrieve messages from the number indicated plus 1.
In the second case, the next time you retrieve messages, the dialog box showing the number of messages on the server and the number of last messages to be retrieved will be displayed. You should indicate the number you think is appropriate.
In both cases, there will be no problem of duplication with previously retrieved messages, only the number of unread messages will be less than the number of messages announced to be retrieved in the progress window.
3.14. Tools

1ᵒ Message deletion validation
The Don't ask again (Message & List windows) concerns the deletion of messages from the database. When unchecked, you will be asked for confirmation when you run the delete command on one or more messages ( ⌘ D from a List window or a Message window.) If you check it, deletion will be immediate.
Note that this option is also present in the delete confirmation dialog box. If you check it in the dialog box, it will automatically be checked in the Tools Preferences. To reactivate confirmation, uncheck it again in the Preferences.
Exception: If the selection of messages to be deleted contains at least one locked message (marked with a pictogram), you will be asked for confirmation even if the option is checked.
2ᵒ Import MacSOUP news archive
The Import command is used to import archived messages into the MacSOUP newsreader. The procedure is explained in detail in Chapter 2.03. Import MacSOUP news archive, which we recommend you read carefully before starting.
3ᵒ Table consistency tests and repairs
• When searching by M‑ID, you may encounter the following error message:

This means that the message you are looking for is not referenced in one of the message tables used by MacCafé, because it was purged in a version prior to 2.08. This error blocks the search for the message concerned.
To remedy the problem - and at the same time repair any inconsistencies linked to other previously purged messages - simply follow the recommendation in the error message, i.e. open the Tools preferences and click on the Messages button.
• The Threads button is used to correct inconsistencies related this time to the threads table. Essentially, it's a matter of ridding the table of 'slag', the presence of which does not, however, disrupt MacCafé's operation.
3ᵒ 4D Maintenance and Security Center
As indicated in the IMPORTANT text box (see screenshot above), only the most useful MSC functions will be discussed in this chapter. For other functions, you can consult the documentation on the 4D website, by clicking on th Online Documentation… button.
To access the MSC, click on the Open MSC button.
Until the writing of this chapter is completed, we recommend that you do not use the MSC tools if you don't master the 4D environment.
4. Windows
This section identifies the various MacCafé windows and describes their use.
When a button is present at the top of the window, this allows you to display a specific help panel. Do not hesitate to refer to it to find out or remind you of the actions available in the window. To close the help panel, just click on it.
In addition, the buttons with an icon are usually equipped with a tooltip that appears on mouse hover.
Most MacCafé windows can be closed in three different ways:
– click on the Close system button
– ⌘ W system shorcut
– Esc shortcut
Exception: on the Profile window, both keyboard shortcuts are inoperative, and clicking the system button is equivalent to quitting MacCafé.
– some windows also have a Close button.
Alerts warn you in case closing the window might cause you to lose some data (for example, when you close the Compose window after you have started to enter text in it).
Only the Preferences window is modal, that is, you cannot access the other windows while it is open.
Note: MacCafé has two special windows which will not be described in this section but in chapter 6. Search by Message-ID, as they are both used for searching messages.
4.01. Profile (window)

The Profile window is the main MacCafé window. As explained in chapter 4 above, if you close it, you exit MacCafé.
The window title contains the name of the active database.
1ᵒ The list of profiles
The Profile drop-down list contains all the profiles you have created, and allows you to change profiles.
Note: You cannot change profiles while a message retrieval of the active profile is in progress. You have to wait until it is finished.
2ᵒ The toolbar
The toolbar contains the following seven buttons:
|
Preferences… ⇾ opens the Preferences… window. |
 |
Purge ⇾ opens the Purge window. |
 |
Search ⇾ opens the Search window. |
 |
Filters ⇾ opens the Message filters window. This button is disabled when a message retrieval is in progress. Likewise, when the Filters command is launched by clicking on it, no message retrieval (both manual and automatic) will be possible as long as the Message Filters window is open. |
1  2  3  |
Fetch news ⇾ launches a manual message retrieval. Design 1: auto retrieval disabled. Design 2: auto retrieval enabled. When an automatic retrieval is in progress, an animated icon Design 3: the red button (clickable) is displayed when, auto retrieval being enabled, a limit on the number of messages to be retrieved has been defined in the preferences, and at least one group contains a number of available messages exceeding this limit (the number of groups concerned is displayed in a tooltip when hovering over the button). This functionality is described in the chapter 3.12 Message retrieval. |
 |
Send ⇾ starts sending messages to the server. When messages are ready to send, a red dot displays their number on this button. ⇧ + click on this button launches the command Send then Fetch news from all groups. This button does not work if there is no message to send. |
 |
Pending messages ⇾ Shows pending messages (draft or ready to send). Inoperative if no message is waiting to be sent. When messages are pending, a red dot displays their number on this button. In addition, if you press the ⌥ key when hovering over the button, a small table will tell you, for each profile, the number of messages ready to send and the number of mmessages saved as drafts. |
3ᵒ The group list
This list displays the groups you are subscribed to in the active profile.
• The first column lists the group names and displays the number of groups.
• The Unread column displays the number of unread messages in each group. If one or more groups contain unread messages, the title Unread is displayed in bold.
This number is displayed in red when the group in question contains new ignored messages (i.e. marked as read upon retrieval, see the chapter Message filters). If the group contains new ignored messages but no unread messages, a 0 is displayed.
The number of unreads will return to black (or disappear if it is 0) in one or other of the following cases:
- At the first message retrieval following the opening of the group concerned (in other words, as long as you have not consulted this group, the red display will persist), provided of course that this retrieval does not bring new ignored messages;
- When all messages have been marked as read, either manually or via the ⌘ E shortcut.
• The Total column displays the total number of messages contained in the database for each group.
• The last column displays various pictograms:
| Indicates that the group contains at least one checked message. | |
| Indicates that the group contains at least one locked message. | |
| P | Indicates that the group contains at least one new message posted by a kill-filed author. This pictogram will disappear on the next retrieval, provided that the group has been opened in the meantime, and that this retrieval does not retrieve new messages from kill-filed authors. |
| M | Indicates that the group is moderated (or self-moderated, see Appendix 4). |
| X | Indicates that the group is read-only (no posting allowed there on the active server). |
| A | Indicates that the group is missing from the active server and its message retrieval is disabled. This A can mean that the group has been deleted from the server (see chapter 3.03. Newsgroups List). It can also appear after importing data from MacSOUP, if you forgot to retrieve the list of groups before starting the import. If so, see Appendix 2. Troubleshooting. |
You can change the display order of groups by moving them using drag and drop.
4ᵒ The context menu
a. Right click on a single selected group
Disable / Enable message retrieval ⇾ Allows you to disable or re-enable message retrieval for this group only.
Fetch news from this group ( ⇧ ⌘ K) ⇾ Starts an immediate message retrieval for this group.
When message retrieval from this group is disabled, this item is grayed out and inoperative.
FIRST MESSAGE RETRIEVAL OF A GROUP

1. General case
When you check a group to retrieve messages for the first time, a dialog box prompts you to choose the number of messages to retrieve. You can choose to:
– leave the number entered as default, in order to retrieve all the messages in the group;
– enter a lower number; for example, if you type 200, only the 200 most recent messages posted to the group will be retrieved;
– enter 0 if you want to postpone this first message retrieval of the group. In this case, the dialog box will be displayed again the next time the same group is checked for retrieval.
For subsequent retrievals, you will no longer have the choice of the number of messages to retrieve (all available messages will be retrieved), unless you define a limit number in the Preferences. Consult chapter 3.12 Message retrieval for more information on this subject.
2. Special case: taking into account the limit set in the preferences
If, in the Message retrieval preferences, you have checked both boxes below:

the dialog for choosing the number of messages to retrieve will only be displayed if the number of messages available exceeds the limit set in these preferences.
Example: both boxes are checked and the limit is set to 100.
- On first retrieval, the group contains more than 100 messages ⇾ The dialog is displayed and you can choose the number of messages to retrieve.
- On first retrieval, the group contains a number of messages less than or equal to 100 ⇾ The dialog is not displayed and all available messages are noted.
Post a new message here ( ⌘ K) ⇾ Opens the Compose window (the name of the selected group will be entered in the Newsgroups field of this window).
When group message retrieval is disabled, clicking this item will display a confirmation dialog.
Unsubscribe from this group ⇾ Allows you to unsubscribe from the selected group in the active profile.
If you subscribed to the same group in at least one other profile, the group will simply be removed from the list of the active profile. It will always be available with all its messages in the other profiles that contain it.
If the group is only present in the active profile, all the messages it contains will be deleted from the database. The operation may take time if it is a 'large' group.
In both cases, you will be asked for confirmation.
Insert separator below… ⇾ Opens the New separator dialog box, where you can add a separator line to the list, with or without name. The use of separators is described in the box at the end of this chapter.
b. Right click on a selection of several groups
Mark these groups as read ⇾ Marks all messages in selected groups as read.
Fetch news from these groups ( ⇧ ⌘ K) ⇾ Starts a message retrieval of the selected groups.
Disable message retrieval from these groups ⇾ Disables message retrievaal for all selected groups.
Enable message retrieval for these groups ⇾ Enables message retrieval for all selected groups.
5ᵒ Select a group and open its message list
You can select a group:
– either by clicking on it,
- or by using the ▼ and ▲ arrows to access it.
The ⤒ key (or Fn◀︎ depending on your keyboard) selects the first group in the list. The ⤓ key (or Fn▶︎) selects the last group in the list.
To open the message list of the selected group, you can choose to:
– double-click on the group,
– press the Enter key (or FnReturn for keyboards without this key).
6ᵒ Open the message list of the first group containing unread messages
Space opens, from the last selected group, the first following group containing unread messages.
⇧ Space forces the opening of the first group in the list regardless of which one is selected.
7ᵒ Keyboard shortcuts (also available in List windows)
• To post a new message in the selected group, press ⌘ N.
If several groups are selected, the message will be published in the last group added to the selection.
• Press ⌘ E to mark all messages in the selected group(s) as read and unchecked.
ABOUT SEPARATORS
Separators are elements that allow you to organize the group list (see the screenshot at the beginning of this chapter).
Creating a separator
When you choose the Insert separator below… item in the context menu of a group, a new line entitled 'New separator' is immediately created under this group, and the dialog box below is displayed, allowing you to customize your separator.

• You can enter the name of your choice, or even leave this field empty. Note, however, that a name that is too long might appear truncated in the list.
• You can choose the font size, its style (normal, bold and/or italic) and its color, as well as the background color of your separator. The font size can be reduced by up to 4 points, allowing you to create separators consisting of a single line (at the minimum size, even if the separator contains text, it will not be visible) .
• The Rendered line provides a preview of the separator as it will appear in the list.
• The list of existing styles brings together all the separator styles present in your different profiles. You can apply one of these styles to the separator currently being edited, either by double-clicking that style or by choosing Apply these style settings… in the context menu.
• When you have finished editing your separator, click Save to apply your settings to the New separator line. If you click Cancel, this line will be deleted.
Actions on separators
• Separators can be moved freely in the list.
• Unlike groups, they are not selectable, but a right click on a separator displays a context menu containing the following items:
Edit Separator… ⇾ Displays the separator editing dialog box, which works identically to the New Separator dialog box.
Delete separator ⇾ Allows you to remove the separator (you will be asked for confirmation).
• It is also possible to access the editing dialog box by making a double click on the separator.
4.02. List

The List windows display the messages contained in a group.
The name of the open group is displayed at the top of the window, next to NewsGroup.
1ᵒ Display settings
• Show : allows you to choose which messages should be displayed in the list, depending on their attributes. Here are the possible choices, with corresponding keyboard shortcuts:
Unread = 1; Read = 2; All = 3; Checked = 4; New (since last retrieval) = 5; Locked = 6; Kill-filed = 7.
The following items are added:
- a submenu allowing you to display Tagged messages, either according to their color, or as a whole (All, shortcut 8);
- a submenu dedicated to Ignored messages, containing the items All (shortcut 9, displays all messages ignored / auto-ignored), User (shows only messages marked auto-ignored by the user) and Filter (shows either all messages ignored / auto-ignored by filtering, or those marked with a pictogram  of the chosen color).
You can choose not to display Ignored and/or Kill-filed messages.
As in the Display settings 2 preferences, if you check an option that contradicts the choice made in the list, for example:
- Show messages Kill-filed
and
- except Kill-filed
the checked option will not be taken into account. In our example, the kill-filed messages (and only them) will indeed be displayed.
• Show Age / Date: determines in which format will be displayed the message timeline (in the third column of the list). Examples:
Age of messages: 2 d, 10 h 13 min…
Message publication Date: 2020/05/20, at 12:26:09…
This choice will be reflected in the message reading window that you open: in the message header, you will see a line " Date: …”, or a line “Age: …”
• Group threads:
– When this option is checked, messages from the same discussion are grouped together in the list. You can choose in which order the threads will be displayed: None / Newest first (age increasing) / Oldest first (age decreasing).
– When the option is unchecked, threads are not grouped, and the display order of messages can be adjusted by clicking on a column title, which reveals an arrowhead or . Clicking the column title again switches from increasing to decreasing order (or vice versa).
2ᵒ Filters (ungrouped thread mode only)
When messages are not grouped into threads, you have two input fields that allow you to filter them.
• To display only messages from an author, enter their pseudonym in the Author field.
• To filter messages by subject, enter all or part of a subject in the Subject field.
3ᵒ The  button
Clicking the gear button displays four commands. The first two, placed under the title Database correction, are intended to repair the display of messages contained in the database; refer to the corresponding chapters for more information (see links below).
Header fields ⇾ Displays the header of the selected message in the Header data correction window.
Text encoding ⇾ Reloads the selected message body from the server (if still available) and opens it in the Text encoding correction window.
Reload message ⇾ Reloads the body of the selected message from the server (if it is still available) and saves it in the database instead of old body.
If you notice after a message retrieval that the body of a message appears truncated, this may be the result of a connection problem during the retrieval. If this is the case, the Reload message command will allow you to recover the complete message body.
If the message is still incomplete after being reloaded, it is probably because it was sent as is by its author.
If the Reload message command returns you an alert specifying that the message is no longer available on the server, this means either that it has been canceled or replaced by the author, or it has been deleted from the server for one reason or another. You then have the choice between Leave as is, that is to say keep the message in the MacCafé database, and Delete the message from the database.
New message in this group ⇾ Opens the Compose window (the name of the group opened in the list will be entered in the Newsgroups field in this window). If it is impossible to post in this group, an alert will appear and give you the reason. If message retrieval is disabled for the group, you will be asked for confirmation.
4ᵒ Message list columns
The message list has five columns. From left to right:
• Pictograms column ⇾ The following pictograms are displayed:
| NL | Unread message (the subject of which is displayed in bold letters in the list) |
| Checked message | |
| Auto-check enabled | |
| Message ignored (marked as read on retrieval by a message filter). The color of the pictogram is variable. | |
| Auto-ignore enabled (the pictogram is displayed in red if the action comes from a message filter) | |
| Tagged message (highlighted by a message filter or by manual addition of the tag). The color of the tag varies. | |
| Locked message | |
| P | Message from a kill-filed author (marked as read on retrieval) |
• Author column.
• Lines column ⇾ Displays the number of lines in the body of the message
• Age / Date column ⇾ See section 1ᵒ.
• Subject column.
5ᵒ Actions on messages
a. Actions available if only one message is selected
• Open message :
– With the mouse: double click on the message line.
– On the keyboard: Enter (or FnReturn for keyboards that do not have this key).
Notes
• Normally, the message opens in a new Message window.
If at least one Message window is already open, you can force the opening of the selected message in the last Message window opened, replacing the message that was displayed there. To do this, use the key⌥:
– With the mouse: ⌥ + double click.
– On the keyboard: ⌥Enter (or ⌥FnReturn for keyboards without Enter).
• If the message you opened has been cross-posted (that is, published simultaneously in several groups), it will be marked as read not only in the active group, but also in other groups where it has been published and to which you are subscribed. If Auto-check is enabled for this item, it will also be enabled in the other groups.
• Mark message as read/unread:
– On the keyboard: ⌘ M (an unread message changes to read and vice versa).
• Unlock message:
– On the keyboard: ⌘ L (only acts if the selected message is locked).
• Unlock all messages in the thread to which the selected message belongs:
– On the keyboard: ⌥ ⌘ L (does nothing if the thread does not contain any locked messages).
• Kill-file the author of the message, or rehabilitate him/her if he/she was already kill-filed:
– On the keyboard: ⌘ K
Messages published by the kill-filed author are assigned the pictogram P (visible in the List windows, in the Profile window and in the graphical representation of the thread in Message windows).
For future messages from the same author, go to the Author filtering preferences where you can choose the filtering mode:
⇾ either mark the messages as read during message retrievals (they will then receive the P) pictogram;
⇾ or delete them during message retrievals (so they will not appear in the List windows).
The same shortcut, applied to an already killed author, allows you to rehabilitate him/her:
⇾ future messages from this author will no longer be marked as read or deleted during retrievals;
⇾ any messages from this author present in the database will have the P pictogram removed.
• Check / uncheck the message (if the threads are not grouped) or its entire thread (if the threads are grouped):
– With the mouse : click in the pictogram column on the message row. If threads are grouped, ignored messages (marked with ) will remain unchecked. To include them, do a ⌥ + click.
– On the keyboard :
Return ⇾ All messages, except ignored ones, are checked.
⌥ Return ⇾ All messages, including ignored ones, are checked.
• Activate/deactivate auto-check from the message, or for the entire thread if the threads are grouped:
– On the keyboard: + (activate) / − (deactivate).
• Delete message from database:
– On the keyboard: ⌘ D.
The text box at the end of this section contains important information about deleting messages.
b. Actions available if multiple messages are selected
• Open messages:
– On the keyboard: Enter (or FnReturn for keyboards that do not have this key).
Note: As each selected message opens in a new window, you will be asked for confirmation if more than five messages are selected.
Tip: If you have opened a large number of messages, their windows can be closed all together via the Window Messages Close all menu item.
• Unlock messages:
– On the keyboard: ⌘ L (all locked messages present in the selection are unlocked).
• Check / uncheck messages:
– On the keyboard: Return.
• Mark all messages as read and unchecked:
– On the keyboard: ⌥ ⌘ E (this action of course only has an effect if the selection contains at least one unread and/or checked message).
• Delete messages from database:
– On the keyboard: ⌘ D.
Important notes about message deletions
• Messages are deleted locally, that is, messages are deleted from the MacCafé database and not on the server. It is therefore still possible to consult them using the Search by Message-ID.
• The M‑IDs of deleted messages are remembered by MacCafé, so that they cannot be reloaded during later recovery. This processing of M‑IDs may take time if you delete a large number of messages; however, it is carried out in the background (a red dot comes to life on the button ![]() while it is in effect). If you quit MacCafé while processing has not finished, it will simply be suspended and continue the next time MacCafé is opened.
while it is in effect). If you quit MacCafé while processing has not finished, it will simply be suspended and continue the next time MacCafé is opened.
• If you have not checked the Don't ask again (Message & List windows) option in the Tools preferences, you will be asked for confirmation before deleting messages. The confirmation dialog contains the same option; if you check it, this choice will be reflected in the Tools preferences and future deletions will be carried out without confirmation (unless the selection of messages to delete contains at least one locked message).
6ᵒ Actions on the list
• The ▲ and ▼ keys allow you to navigate through the list.
The ⤒ key (or Fn◀︎ depending on your keyboard) selects the first message in the list. The ⤓ key (or Fn▶︎) selects the last message in the list.
• Mark all messages in the list as read and unchecked:
– On the keyboard:: ⌘ E (this command is also available in the Profile window).
• Unlock all locked messages in the list:
– On the keyboard: ⇧ ⌘ L.
• Reopen the last viewed message in the active list:
– On the keyboard: ⌘ B.
The last message you opened is remembered for each group to which you are subscribed. If you have never opened a message in the group in the active list, or if the last message opened in this group was deleted from the database, an alert will be displayed.
• Open the first checked message or the first unread message in the list (depending on the setting of Display settings 2): press Space .
4.03. Message (reading)

The Message windows display the contents of a message posted to a newsgroup.
1ᵒ The information banner
At the top of the Message window the following information is displayed:
• Newsgroup ⇾ The name of the group from which the message was opened.
• Author ⇾ The pseudonym of the author of the message.
• Subject ⇾ The subject of the message (if it begins with "Re:", it is a reply to another message).
If the message displayed is a reply to the very first message in a thread and this message is missing (whatever the reason: message filtered by the server, published on another group, purged, deleted by you, etc.), a button is displayed to the left of the information banner, to allow you to access this missing message. This button can take two forms:

Means that the missing message is present in the MacCafé database (it was published in another group to which you are subscribed). A click on the button displays the original message in a new Message window.

Means that the missing message does not appear in the MacCafé database. A click on the button launches the online search for this message based on its Message-ID (provided that this functionality is activated in the Preferences, see the section 3ᵒ of chapter 3.10). This process is detailed in the chapter 6ᵒ Search by Message-ID.
If the message displayed is a cross-posted response with Followup-To (see section 3ᵒ) to a message that is not in the active group, the icon (whether gray or blue) is marked with a F.
In the right part of this banner there are buttons whose action will be detailed in section 5ᵒ.
2ᵒ The graphical representation of the thread
In this panel, the discussion (or thread) in which the message is located is represented in the form of a tree, each message being linked to the replies made to it, as well as to the message to which it possibly replied.
Each message in the thread is represented by a small circle ○, with the following variations:
| ○ | Message read. If the message is tagged ( ) or ignored () , the corresponding pictogram is displayed instead of the circle. ) or ignored () , the corresponding pictogram is displayed instead of the circle. |
| ◉ | The message is being read. If the message is tagged or ignored, the outer circle is replaced by the outline of the pictogram. |
| ⊗ | Unread message. If the message is tagged or ignored, the cross is superimposed on the pictogram. |
| ○ | Locked message. |
| ○⇛ | Checked message. |
| ○+ | Auto-checked message. |
| ○– | Auto-ignored message. |
| P○ | Message from a kill-filed author. |
| S○ | Message previously deleted in MacCafé, then restored in the database. See the action of the Save to database button. |
| ○ | 'Ghost' message (gray circle), absent from the thread although it is referenced there. Read the text box below to find out more. |
When the mouse pointer hovers over a circle, the pseudonym of the author of the corresponding message is displayed in a tooltip (which can be empty in the case of a ghost message, read the text box below) .
Notes
• The display of a ghost message can have various causes: it could be a message that you deleted from the database or that MacCafé itself deleted during retrieval, that your server filtered, that was canceled or replaced by its author, or which was published in another group…
Two special cases: if the ghost message came from a kill-filed author (see chapter 3.09. Author filtering), the circle is surmounted by a P; if it is a message deleted by a message filter (see chapter 4.12. Message filters), the circle is surmounted by a S.
As a general rule, the tooltip displayed when hovering over the circle of a ghost message is empty. However, the author's pseudonym may be displayed there if it is a message that you have deleted from the database (via ⌘ D or via a purge script).
If the ghost message is present in the database (case of a message referenced in the thread but published in another group to which you are subscribed), a click on its circle displays the command Show message which opens the message in another Message window. Otherwise, the Online Search command is displayed (provided that online search is enabled in the Preferences, see section 3ᵒ of chapter 3.10). It starts searching for the message based on its Message-ID. Read chapter 6ᵒ Search Message-ID for more information on this subject.
• If you notice that clicking on a ⊗ circle (unread message) does not directly open the message but displays the Show message, it means that this is a message which has just appeared, following automatic retrieval, in the thread you are currently viewing. Un clic sur Show message will open it in a new window. (This behavior of MacCafé partially corrects a bug which should be resolved soon.)
• The circles representing your own messages are displayed in the color you chose in the Display settings 1 preferences.
To browse the thread:
• with the mouse
– Click on a circle (not grayed out) ⇾ the corresponding message is displayed in the active Message window, in place of the one that was previously displayed.
– ⌥ + click on a circle (not grayed out) ⇾ the corresponding message is displayed in a new Message window.
– If the graphical representation of the thread extends beyond the frame, you can drag it with the mouse, holding down the right button.
• on the keyboard
– Navigate horizontally (on the same branch): ▶︎ and ◀︎ arrows. When you have reached the first circle of the branch, the ◀︎ arrow goes back to the message before the branch.
– Go down a branch: place yourself on the first circle just after the junction, then press the ▼ arrow.
– Go back one branch: press ⇧◀︎ (or Backspace) to return to the first circle of the branch (if it is not already selected), then press the ▲ arrow. You will reach the first message of the top branch.
– Go back to the message from which the branch starts: ⇧◀︎ (or Backspace) to return to the first circle of the branch (if it is not already selected), then ◀︎ (or Backspace) to go back to the circle preceding the junction.
– Return to the first message in the sequence: O key.
Note: The actions described above may be slightly different if one or more ghost messages are present in the thread: MacCafé will ensure that these do not block navigation.
• with space bar
Space allows you to continuously consult all checked or unread messages (depending on the setting chosen in the Display settings 2) contained in the thread. By successive presses of Space , you can scroll through the text of each unread/checked message, then move to the next unread/checked message. When there are no more unread/checked messages in the thread, a final press on Space closes the window.
Note: If you have opened a message from a thread containing no checked/unread messages, Space will just scroll the text to the end, then close the window.

The four arrows of the compass allow you to move the graphical representation of the row in the panel (in case it extends beyond the frame). A click on an arrow moves it one step in the corresponding direction, ⇧ + click moves it two steps.
3ᵒ The header panel
This panel displays the main header fields of the message (decoded if necessary):
• Newsgroups: ⇾ The list of groups in which the message was posted.
• Followup-To: ⇾ This optional field is used by the author to redirect replies to his/her message to a particular group when he/she has published this message on several groups, or to redirect them to his/her own mailbox (with a Followup-To: poster, see section 6ᵒ).
• Subject: ⇾ The subject of the message.
• From: ⇾ The identity of the author (pseudonym + email address).
Note
If the From field is displayed as an email address written twice:
archibald@moulinsart.be <archibald@moulinsart.be>
this means that in the message header, this field consists only of this email address. This address therefore serves as both a pseudonym and, if valid, a reply address.
• Date: or Age: ⇾ Depending on the choice you made in the display parameters of the List window, either the publication date of the message, or its age. You can toggle between the Date: and Age: views by clicking on the header field name (the word Date: or Age: at the start of the line).
Reminder: The date display will always depend on your Language and Region system settings.
• Organization: ⇾ A slogan chosen by the author of the message or by the server used to post the message. This field being optional, it may be missing in certain messages.
• User-Agent: or X-Newsreader: ⇾ The description of the newsreader used by the author of the message. This field is also optional.
• Reply-To: ⇾ The reply email address of the author of the message. This field is optional (see its description in chapter 3.04).
When the content of a header field is too long to be displayed entirely, 4D abbreviates it by replacing the central part with '…'. This mainly concerns the following four fields: Newsgroups, Subject, From and User-Agent ( or X-Newsreader).
For each of these four fields, it is possible to display the entire content in a small window. To do this, place the mouse pointer on the name of the field (for example on the word Newsgroups:) and press the key ⌥ . The small window closes automatically as soon as you release the ⌥ key.
The full message header can be displayed in the message body panel (see section 4ᵒ).
In the header panel can be displayed, if they exist, the X-Face of the author of the message, his/her Face or his/her dbFace.
If you have assigned a dbFace to the author (see the DB Faces chapter), it will be visible, even if the author has added an X-Face and/or a Face in the header of his/her message. However, it is possible to switch from one image to another by clicking on it.
To the left of the first header field is a pictogram which can take three different forms:
![]() if the message is marked as ignored (the color of the triangle may vary).
if the message is marked as ignored (the color of the triangle may vary).
![]() if the message has a tag (the color of the flower may vary).
if the message has a tag (the color of the flower may vary).
In this case, clicking on the flower displays a menu that allows you to either change the color of the tag or delete it.
 if the message is neither ignored nor tagged.
In this case, a click on the flower displays a menu which allows you to add a tag of the color of your choice to the message.
To find out more about these pictograms, go to chapter 4.12. Message filters.
Finally, a  button (variable color) is displayed in front of the Reply-To field if it exists, otherwise in front of the From field. It allows you to reply by email to the author of the message. Its use is detailed in section 6ᵒ.
Multiple content messages
For some messages, the Content-Type field is added to the bottom of the header panel, accompanied by a drop-down list displaying text-plain by default. This means that the message was posted in multipart, that is to say that it is a message with multiple contents, each part being delimited by tags.
You will rarely encounter messages like this on text discussion groups because they are not popular there. On the other hand, on certain private hierarchies such as that of Zoo-Logique, the use of multipart is much more frequent. In previous versions, MacCafé could not be used effectively to consult such hierarchies; it is now possible.
There are three types of multi-content messages:
- multipart/mixed ⇾ contains a plain text portion, as well as one or more attachments.
- multipart/alternative ⇾ contains a part in plain text and a part in HTML.
- multipart/signed ⇾ contains a plain text part and a PGP signature.
From v.3.01, MacCafé is able to display the different parts of such a message, and this is precisely the role of the drop-down list. Depending on the type of message, you can find the following choices:
- All (raw) ⇾ The complete body is displayed with its different parts and tags, without any decoding.
- text/plain ⇾ The plain text part (decoded), which MacCafé will display as in any message containing only plain text.
- text/HTML ⇾ A part in HTML, of which MacCafé will display the graphic rendering in a separate window.
- text/HTML (raw) ⇾ The same part in HTML, this time displayed as code in the Message window.
- [attachment] (variable denomination) ⇾ If the attachment is an image (image/jpeg, image/png, etc.), MacCafé will display it in its viewer.
- [attachment] (raw) ⇾ The undecoded attachment, displayed in the Message window.
- application/pgp-signature (raw) ⇾ A PGP signature.
Note
- It can happen that a message in multipart is poorly formed or poorly declared (for example, a message with PGP signature declared in multipart/mixed). In such cases, MacCafé, like any other newsreader, cannot guarantee the correct display of the different parts.
- It may take a little longer to display a multi-content message than a plain text message.
4ᵒ The message body panel
This panel contains the actual text of the message, in which any quotations, as well as the author's signature (if present), are displayed in the colors specified in the Display settings 1 preferences.
The full message header can also be displayed there, if you have chosen this option in the Display settings 1 preferences. Furthermore, the H keyboard shortcut allows you to show/hide the full header.
To scroll the text if its length exceeds the height of the panel, you can use the following keys, depending on the type of keyboard you have:
| Action | Keyboard with numeric keypad | Keyboard without numeric keypad |
|---|---|---|
| Scroll up | ↑ | Fn▲ |
| Scroll down | ↓ | Fn▼ |
| Go back to top | ⤒ | Fn◀︎ |
| Go down to the bottom | ⤓ | Fn▶︎ |
The context menu of this panel has some differences depending on whether you right-click on unselected text or on a selection.
Copy:
a. without selection ⇾ Only appears if the mouse pointer hovers over a URL, email address or Message-ID. It is this element that will be copied to the clipboard.
b. with selection ⇾ Copies the selected text to the clipboard.
Open URL:
a. without selection ⇾ Only works if the mouse pointer hovers over a URL detected by MacCafé (invisible or grayed out otherwise). The URL is sent to the associated application (browser, FTP client, etc.).
b. with selection ⇾ Still visible and functional. MacCafé does not check that the selection constitutes a valid URL and sends it to the application which it considers most appropriate. In return, any valid URL can be transmitted, as long as an application is associated with it.
Show image:
a. without selection ⇾ Only works if the following conditions are met:
- the URL starts with http://, https:// or www.;
- the URL ends with one of the extensions referenced in the list accessible via the Window Supported image formats menu.
If the image exists, it is displayed in a viewer integrated into MacCafé (see the text box at the end of the chapter). Otherwise, an error message is displayed in this same viewer. GIF images will be displayed without animation.
b. with selection ⇾ Still visible and functional. MacCafé does not check that the selection constitutes a URL actually pointing to an image and will systematically display a viewer containing either the image if it exists, or an error message. Preferably, we will only use this method if the URL is split into several lines and not surrounded by angle brackets. This method can also be useful for certain types of URLs, such as gemini://.
To fully understand how MacCafé manages URLs, it is recommended to read the text box at the end of this chapter.
Show message and Send email…:
a. without selection ⇾ These two commands are only active if the mouse pointer hovers over an element of type local-part@domain. Since this structure is shared by email addresses and Message-IDs, MacCafé systematically displays both choices. It is therefore up to you to check, depending on the context, whether you are dealing with an email address or a Message-ID.
The Show message command will submit the Message-ID (or assumed such) to search by Message-ID (read the chapter 6ᵒ Search by Message-ID to find out more).
The Send email… command will transmit the email address (or assumed one) to your email client.
Notes
• It is possible that both commands are activated even though the element hovered over is neither an email address nor a Message-ID. Example in the header of a message:
posting-account="archibald@usenet"
where archibald@usenet designates the identifier of a user account.
• Regarding Message-IDs, it is generally advisable to precede them with the prefix news: when publishing them on Usenet, which allows them to be identified without fail.
b. with selection ⇾ Both commands are still active. Same actions as above, but the content of the selection is not checked.
In the case of a right click with selection, three additional items are offered:
Search with [chosen search engine] ⇾ Opens the default web browser to search the content of the selection, using the search engine you chose in the Search engines preferences.
Translate with [chosen translation site] ⇾ Opens the default web browser to display the translated content of the selection, using the translation website you have chosen in the Search engines > Translator preferences.
Encode or Decode in ROT13 ⇾ Transforms selected text according to the ROT13 algorithm (explanation on Wikipedia). This command is also accessible by the ⌥ ⌘ R shortcut.
5ᵒ The information banner buttons
• Auto-check
This action allows you to auto-check all the messages in a branch of the thread or the complete thread. When a message is marked as auto-checked (+), if replies to that message arrive in future fetches, they will automatically be marked as auto-checked and given the same + sign.
 |
Activate (⬬) / deactivate (⬬✕) auto-checking of the active sub-thread and its own sub-threads. |
 |
Activate (⬬) / deactivate (⬬✕) auto-checking of the whole thread. |
• Auto-ignore
This action allows you to ignore all messages from a branch of the thread or the entire thread. When a message is marked as auto-ignored (━), if replies to that message arrive in future retrievals, they will be automatically marked as read and given the same ━ sign.
These buttons are accessible by pressing the ⌥ key when hovering over the Auto-check buttons.
 |
Activate (━) / deactivate (━✕) auto-ignore of the active sub-thread and its own sub-threads. |
 |
Activate (━) / deactivate (━✕) auto-ignore of the whole thread. |
• Locking / Unlocking
 |
The message is not locked. Click the button to lock it. |
 |
The message is locked. Click the button to unlosk it. |
Message locking helps you highlight and preserve important messages that you want to be able to easily find and view at any time.
• In the Profile window, groups containing one or more locked messages are marked with the pictogram.
• In List windows, the same pictogram indicates locked messages. It is possible to display only locked messages ( 6 shortcut).
• Finally, locked messages are by default protected against deletion when running a purge script: when you create a script, simply leave the Preserve locked messages option checked. Likewise, the manual deletion of a locked message (via ⌘ D) must be systematically validated in a confirmation dialog.
• Mark as read / unread
 |
The message is marked as read. Click the button to mark it as unread. |
 |
The message is marked as unread. Click the button to mark it as read. |
• the button
Clicking on the gear-shaped button displays the following menu:
Copy Message-ID ⇾ Copies the message identifier to the clipboard.
Copy email address ⇾ If the message header contains a Reply-To field, it is the email address contained in this field which is copied to the clipboard, otherwise this is the address indicated in the From field.
Copy subject ⇾ Copies the contents of the Subject field to the clipboard.
Copy pseudonym ⇾ Copy the author's pseudonym indicated in the From field (without the email address).
-- All messages in the thread -- Mark them as read and unchecked ⇾ Marks as read and unchecked all messages in the displayed thread which are not yet checked. This action can also be accomplished via the ⌥ ⌘ E shortcut.
Save… ⇾ Opens the Save (.txt) message dialog box. The .txt formatted record will contain the header fields you checked in the dialog box, followed by the body of the message.
Print… ⇾ Opens the Print Message dialog box. You can choose which header fields to include. You can also choose to include or not the dbFace if it is present, or the X-Face if it is present. If you print in color, the quote and signature colors will be reproduced when the message is printed.
In each list, you can freely choose the fields to include by checking them. You can also choose to include the entire list (Select All) or not include any fields in the list (Deselect All).
The Save (.txt) message and Print message dialog boxes have two lists of header fields:
• Choice of displayed & decoded fields: these are the fields (decoded if necessary) that are displayed in the header panel.
• Choice of other undecoded fields: these are the fields of the raw header (undecoded).
If you are the author of the message displayed and if this message was posted using the same protection key as that of the active database (see chapter 3.02. Message protection key), two items are added to this menu:
Cancel
This command sends, after confirmation, a request to cancel the message concerned to your news server which will transmit it (or not, see the text box below) to the group control.cancel, in order to inform the other servers that the cancellation of the message has been validated, and that therefore they should no longer distribute it.
Supersede
This command allows you to replace the message concerned with another message, for example if you notice after sending that you have made an error. MacCafé then opens the Compose window containing the message to replace, preceded by the words 'Supersedes: <ID of the message to replace>'. You can correct or even completely rewrite the message before validating it.
MacCafé will automatically add the field 'Supersedes: <ID of the message to replace>' to the header of the replacement message, which will inform the news servers that the message to be replaced must be canceled.
Keep in mind that cancellation or replacement orders are not always honored by news servers, and are even less often honored by websites that archive articles posted on Usenet. These orders therefore in no way guarantee that the message concerned has completely disappeared from the Usenet and Web networks.
Also note that some servers may refuse the cancellation or replacement of a message when it was sent from another server. So it's better to cancel/supersede the post from the server that was used to post it.
Your canceled or replaced messages are not deleted from the MacCafé database, but MacCafé adds a framed mention to them (visible only to you) signifying the cancellation or replacement. If you want to remove them from the database, you can use the Reload message command from the List window; this will also allow you to check if your server has carried out the cancellation or replacement.
6ᵒ Reply to message
• Reply in the group
Optionally select the part of the message to which you wish to reply, then press the F key. The Compose window will open and the portion of the message you selected (or the entire body of the message if you selected nothing) will be included in the form of a quote, with a bracket angle (>) at the start of each line.
If the message you are replying to contains a large number of lines, it is strongly recommended that you select a significant portion of them to include in your reply. In particular, unless it is necessary for understanding, it is better to only include a first-level quotation (lines preceded by a single bracket angle and not several).
This trimming of citations is important not only for readability, but also because some servers may reject a message containing a significant proportion of quoted text:

It is also possible to reduce quotes when writing the message: see the section Processing of quoted text in chapter 4.04.
Special cases
If the cases below occur, a dialog box will be displayed before opening the Compose window.
Case 1. When you reply to a cross-posted message (published simultaneously on several groups) but without Followup-To, the dialog Reply Information opens and displays the following message: You are replying to a message that was cross-posted to [n] groups. Please take a closer look at the recipient groups and delete any that are no longer relevant. In other words, once the Compose window is open, it will be up to you to clean up the Newsgroups list…
Case 2. When you reply to a message whose header includes a Followup-To field (containing one group, several groups or the keyword poster), the Followup-To requested - Choose action… dialog box opens to allow you to choose where your reply will be published.
a. If the Followup-To field contains a single group and you are subscribed to it, you have three choices:
Cancel ⇾ You give up replying to the message.
No Followup-To ⇾ Your reply will be processed according to case 1 (cross-post without Followup-To) and the Reply Information dialog. will be displayed.
Followup-To ⇾ The group indicated in the Followup-To field will be the only group contained in the Newsgroups field of the Compose window.
b. If the Followup-To field contains a single group but you are not subscribed to it, only Cancel and No Followup-To actions are available.
c. If the Followup-To field contains several groups, the Followup-To requested - Choose action… dialog is enriched with a list of these groups. For the Followup-To action to be enabled, you must select the group where you want your reply to be posted. If you select a group that you are not subscribed to, an alert will appear below the list and the Followup-To action will be disabled. (If you are subscribed to the group, but in another profile, an alert will also inform you, but the selection will be valid.)
• Reply by email: the button
In the Message windows there is a button which allows you to reply by email to the author of the displayed message. Its color indicates the status of the reply address verification, depending on the data recorded or not in the database. It can be found in two different locations:
- either in front of the Reply-To field if it exists (in this case, it is the address contained in this field which will be transmitted to your messaging software);
- or in front of the From field if there is no Reply-To field.
The button consists of two parts: a colored area on which you can make a ⌘ + click to reply by email to the message (see below), a white area marked with a small ▾ icon which displays a pop-up menu when clicked. The content of this menu varies depending on the color of the button.

The address has not been verified and is therefore not recorded in the database.
The pop-up menu offers the following items:
Test address ⇾ This command launches the verification of the email address and will result in declaring it either valid or invalid. In both cases, the address and the result will be recorded in the database.
Warning: this verification requires an Internet connection. If you are not connected, an alert will inform you that the verification could not be launched.
For more details about verifying email addresses, see Appendix 7.
Force address as valid ⇾ The address will be saved as a valid address and the button will turn green (no verification will be performed).
Force address as invalid ⇾ The address will be saved as an invalid address and the button will turn red (no verification will be performed).

The email address has been verified and recorded in the database as a valid address.
This means that this address has correct syntax, that its domain is present in the DNS register and that it is compatible with the exchange of emails.
The pop-up menu offers the following items:
Force address as invalid ⇾ The address will be saved as an invalid address and the button will turn red (no verification will be performed).
Delete address from known addresses ⇾ The address record will be removed from the database and the button will turn orange.
Caution! Even if the address is declared valid, there is no guarantee that it actually belongs to the author of the message. If in doubt, it is better to refrain from replying by email, or else ask the author on the group, so that he can confirm that this is indeed his/her address.

The email address has been verified and recorded in the database as an invalid address.
This means that this address contains either one or more syntax errors, or a domain which is not registered or which is incompatible with the exchange of emails.
The pop-up menu offers the following items:
Force address as valid ⇾ The address will be saved as a valid address and the button will turn green (no verification will be performed).
Delete address from known addresses ⇾ The address record will be removed from the database and the button will turn orange.
Detailed cause of the error… ⇾ This command displays an information box containing the description of the first error encountered when checking the address.
The button can be used regardless of its color. A ⌘ + click on the colored part will send the relevant address (whether valid or not) to your email software by default, as well as the body of the message (or the part of the body that you have previously selected) in the form of a quote, to allow the composition of a reply email.
Why allow sending an email address to the messaging software, when we know that it is invalid?
There are cases where this can be useful. For example, some users, to protect themselves from spam, use a method that is not recommended (and even disapproved by certain servers): they add in the email address of their From field an element which must be removed to obtain their real address. For example, the following address:
archibald.[remove to reply]haddock@moulinsart.be
will be diagnosed as invalid by MacCafé (brackets are prohibited in the local part). However, you can send it as is to your email software, then remove the [remove to reply] element to get the author's actual address:
archibald.haddock@moulinsart.be
If the email address pointed to by the button contains characters outside the US-ASCII table (accented characters, for example), it will be declared invalid by MacCafé. If you know that this is an internationalized address that actually exists, you can use the Force as valid address command from the pop-up menu to save it as such in the base.
• Case of Followup-To: poster
If the message you are replying to contains this header field, it means that the author prefers to be replied by email rather than in the group. When the case arises, MacCafé invites you to choose between respecting the author's choice — that is to say reply by email — or reply on the group anyway.
If you choose to reply by email, MacCafé checks the author's reply address (the one in his/her Reply-To field if it exists, otherwise the one in his/her From field). If the address is valid, it is transmitted to your email software to allow you to compose your reply email.
If the address is invalid, MacCafé offers you a new choice: cancel reply or reply by email anyway.
7ᵒ Kill-file / Rehabilitate the author of the message
The ⌘ K shortcut, already encountered in the List window, is also available in the Message window where it plays the same roles: filtering the author of the message or rehabilitating him/her if he was previously filtered. See the Author filtering preferences for more information on the filtering modes offered by MacCafé.
8ᵒ Delete message from database
The ⌘ D shortcut, also present in the List window, allows you to delete the currently viewed message. If you have not checked the Don't ask again (Message & List windows) option (either in the Tools preferences or during a previous deletion), you will be asked for confirmation. Otherwise, deletion will be immediate (unless the message is locked).
Once the message is deleted from the database, the Message window that contained it closes, and of course the message disappears from the List window.
For details on deleting messages, see the related text box in chapter 4.02.
HOW MACCAFÉ MANAGES URLS
1. URLs detected natively by 4D
URLs like http://, https://, ftp: // or ftps:// are automatically detected by 4D; they are displayed in blue and are underlined. They can be opened directly by ⌘ + click.
This detection may be incomplete when a URL is spread over several lines. If you notice that the browser received a truncated URL, start again by right-clicking on the blue part and clicking Open URL. This will allow MacCafé to reconstruct the full URL. If this still does not work (case of a URL trimmed and not framed by angle brackets), select the complete URL before doing the right click.
In addition, the right click Open URL method automatically removes any punctuation marks underlined by 4D at the end of the URL, although they do not belong to it.
2. Additional URL types detected by MacCafé
A few additional URL types are detected by MacCafé, even if these URLs are not displayed in blue. They will open with a right click Open URL, provided that the URL type is associated with an application on your computer. In the absence of an associated application, the Open URL command will have no effect.
x-man-page:// ⇾ opens the corresponding man page in Terminal.
sftp:// ⇾ requires an application that supports the SFTP file transfer protocol.
gemini:// ⇾ requires a Gemini client to open the corresponding page.
gopher:// ⇾ requires a Gopher client to open the corresponding page.
macappstores:// ⇾ opens the corresponding page in App Store.app.
The same remarks as in 1ᵒ apply in the case of a URL spread over several lines.
3. Undetected URL types
MacCafé can a priori process any other type of URL, provided that this type is associated with an application present on your computer. Two examples among others: webcal:// (subscription to a calendar in iCalendar format) or vivaldi:// (opening the Vivaldi browser configuration pages).
To open a URL not detected by MacCafé, you must first select it in full, then use the right click Open URL method.
4. A special case: URLs pointing to an image
If a web type URL (http://, https:// or www.) contains a direct link to an image, a right click (without selection) on this URL followed by a click on Show image will open a viewer in which MacCafé will try to display the image (if this is impossible, an error message will appear in the window).
Other types of URLs, such as gemini://, can also point to an image, but these URLs need to be selected to access the item Show image.
The list of image formats recognized by MacCafé is available in the Window Supported image formats menu. Note that this list varies depending on the macOS version you are using (for example, the .webp format is available from Big Sur onwards, and .avif from Ventura onwards). Also note that certain RAW type files will not be correctly processed (display of a simple thumbnail or a ghost image of 0x0 pixels).
Note: Regarding the JPEG format, although only the .jpg extension is referenced in the list, the .jpeg extension is also recognized by MacCafé. The same goes for the .tiff extension (equivalent to .tif).
This viewer has two display modes:
- Adjust ⇾ If the image dimensions are larger than those of the viewer, they will automatically adjust, so that you can still see the entire image. This mode is used by default when opening the viewer.
When the image is displayed in fit mode, the zoom slider allows you to enlarge the image on a scale from 100% to 500% of the size displayed when the viewer opens.
- 1:1 ⇾ The image is displayed at its actual size and the viewer is equipped with horizontal and/or vertical scrollbars if necessary.
To switch from one mode to the other, you have a 1:1 / Adjust button, as well as the shortcut / .
The viewer informs you of the presence or absence of metadata in the image (EXIF, GPS, IPTC, TIFF): metadata present are displayed in black, those that are absent are displayed in gray.
The Save button allows you to save the image to your computer. When you first use this button, the suggested path for saving is your Pictures folder (~/Pictures), but you can of course choose another destination. The path you choose will be remembered for the next recording.
Note: When you request the display of a .pdf file, only the first page of the document is displayed. However, if you save the file, you will get back the full PDF document. Furthermore, formats displaying only a thumbnail or a ghost image (see above) will be correctly saved.
If you close a Message window, or if you open another message in this same window from the graphical representation of the thread, the viewer(s) which were possibly associated with it close automatically.
If you prefer to view the image in your web browser, choose Open URL rather than Show image.
When you want to share an image hosted on a site like Cjoint or another, consider using the URL that points directly to the image. For example (fake URLs), with Cjoint, rather than:
<https://www.cjoint.com/c/LJpqJb0LSsM>
prefer:
<https://www.cjoint.com/doc/22_10/LJpqJb0LSsK_LJpqJb0LSsM_Base-MacCafe.jpg>
On the Dropbox website, access to images now appears to be conditional on accepting cookies. However, MacCafé does not manage cookies and can therefore no longer display the images on this site. If you want your published images to be able to be displayed in the MacCafé viewer, we recommend using a hosting site based on the free Lutim tool. You will find some examples in Appendix 3. Useful links.
4.04. Compose

It is in the Compose window that you will write your messages. Only one Compose window can be open at a time. If you wish to write a message while another is being written, you will first need to save the latter in draft mode, so that you can finish writing it later (see section 2ᵒ).
REMINDERS
1. To compose a new message, several commands are offered to you.
• In the Profile window, select the group in which you wish to publish your message, then:
– type ⌘ N,
– right-click on the selected group and click Post new message here.
• In a List window, choose:
– type ⌘ N,
– click on the button and click New message in this group.
2. To reply to the message you are reading, type F (see section 6ᵒ in chapter 4.03).
Depending on whether you write a new message or a reply to a message, the content of the window has differences which will be detailed in section 6ᵒ and section 7ᵒ. For now, let's look at the common elements.
1ᵒ Composition settings
At the top of the window, several settings are offered to you:
• Reply formula ⇾ A pop-up menu that allows you to choose one of the reply formulas you have saved in the Reply formula and signatures preferences. This choice is remembered for future messages, until you choose another formula.
• Signature ⇾ Another pop-up menu dedicated to signatures recorded in Reply formula and signatures preferences. Again, the choice is remembered until you choose another signature.
• Spell checking ⇾ when this option is checked, spelling correction is enabled (see section 4ᵒ). When the window opens, it will be checked or not depending on what you have chosen in the Display settings 1 preferences. You can check or uncheck it at any time during writing.
• Lines of [x] characters 72 ⇾ When the window opens, this setting displays the maximum number of characters per line that you chose in the Display settings 1 preferences. The recommended values (proposed by default) in newsreaders are generally 72 or 80 characters. However, you can increase this value for the message currently being written, if for example you wish to include long lines of code (script or other) which must not be cut (unnecessary precaution for long URLs that MacCafé will be able to handle correctly).
Notes
• The values that can be entered in the field must be between 50 and 997 characters inclusive.
If you enter a value less than 50, an alert will invite you to correct your choice, using three buttons:
- Change value ⇾ allows you to enter another value of your choice.
- Favorite XX ⇾ restores the value chosen in the Display settings 1 preferences.
- Minimum 50 ⇾ sets the value to 50.
If you enter a value greater than 997, an almost identical alert will appear, except that the third button will become:
- Maximum 977 ⇾ sets the value to 977.
• You can see that this occasional setting allows you to override the 120 character limit imposed in the Display Settings 1 preferences, bringing it to 997 characters, which corresponds to the maximum defined by the RFCs.
• Save ⇾ Lets you choose between Ready to send (checked by default when opening the window) and Draft mode .
– Ready to send : When you click on the Validate button, your message is placed in the outbox. It will therefore be sent as soon as you click on the Send button in the Profile windows.
– Draft mode : Clicking on the Validate button will store your message in drafts, so that you can resume writing it later. As long as it remains in draft state, it will not be sent.
2ᵒ Buttons
• The Cancel button allows you to abort writing the current message.
– If you haven't written anything in the input area yet, it will simply close the window.
– Otherwise, it will display an alert which will offer you the following three options:
1. Close ⇾ Closes the window without saving the message.
2. Draft ⇾ Saves the message in drafts, then closes the window.
3. Resume ⇾ Goes back to writing the message.
The three commands for closing the window — system button, ⌘ W shortcut or Esc shortcut — have the same effect as the Cancel button, and display the same alert if applicable.
• The Validate button applies the action determined in the Save setting: it places the message either in the outbox or in the drafts. Then the Compose window closes.
If you try to validate a message that does not have a subject while the recording is set to Ready to send, MacCafé will display an alert message and validation will be refused. However, you can save your message without a subject in Draft mode..
The same restriction applies for a message in which you have not entered any text, whether it is a new message or a reply.
• The button is dedicated to adding occasional header fields (see text box in the next section).
3ᵒ The header panel
The header panel displays the following header fields by default:
• Newsgroups ⇾ It contains the name of the original group (the last group selected in the Profile window for new messages, or the group in which the message you are replying to is located). You can add other groups in the drop-down list (if you post your message to several groups, you are doing what is called a cross-post). To remove a group, right-click its name and click Remove group - [group name]. Read section 8ᵒ for more information about cross-posts.
• Subject ⇾ The subject of the message. This field can be edited.
• Followup-To ⇾ The pop-up menu allows you to choose the group you want the discussion to continue to. If you choose poster at the bottom of the list, you will let your contacts know that you only want to be replied to by email. Read section 8ᵒ for more information about followup.
• From ⇾ The field that identifies you (built from your profile information).
• Optionally added is the Reply-To field, if you added it in the Add custom message header fields preferences.
This field can be edited, if you occasionally wish to enter another reply address (which belongs to you, of course). As soon as you have validated your entry (press Return or click outside the field), the email address will be verified. In case it is invalid, an alert will inform you of the first error encountered and the entry will be canceled.
For more information about verifying email addresses, see Appendix 7.
If you completely clear the content of the Reply-To field before validating the entry, it will be removed from the message header.
Adding occasional header fields
You can add occasional header fields to your message. To do this, click on the button, then Add header field, which will open an Extra header field window.
Enter the field name in the Name | field.
Enter the contents of the field in the Data | field.
Click Save. If the header field you chose is allowed, it will appear at the bottom of the header panel list.
You can add other header fields by repeating the steps above.
The header fields thus added can be modified by clicking on the button, then on the name of the field in the --- Edit field --- list.
They can also be removed by clicking on the button, then on the name of the field in the --- Remove field --- list.
Important notes
• Some header fields cannot be added this way, because they are generated either by MacCafé or by the news servers. If prohibited, an alert is displayed.
• An alert also displays if you try to add the same header field twice.
• If you add a header field that is already in the list of your custom header fields (see chapter 3.04), the content of this field will replace the one saved in the preferences (only for the message currently being written).
• The Reply-To field is subject to special treatment.
You can only add it if it is not already in your custom header fields (or if you cleared it in the Compose window, see above). Otherwise, you can edit it directly in the Compose window, as indicated just before this text box.
Reminder: The Reply-To field must contain an email address that belongs to you.
When you add a Reply-To field, clicking on Save launches the verification of the email address. If it is invalid, an alert will inform you of the first error encountered and the field will not be saved.
• In the header panel, manually added fields are marked with a star (*) between the field name and its content.
• It is recommended to consult Appendix 4, where you will find important information on the main optional header fields in use on Usenet.
4ᵒ The input area
This area is intended for writing your message. It has all the standard text management features, whether with the mouse (moving the selection by drag and drop) or with the keyboard (shortcuts identical to those of word processors).
The input area is in fact composed, depending on the case, of two or three individually editable zones, protected by separation elements that cannot be modified or deleted:

This division into independent zones makes it possible to treat the line break differently depending on the case. So, when for one reason or another you decide to reduce or increase the length of the lines in your message, the reply formula and signature will not be affected by this new setting.
Separator elements can be displayed as they actually appear (blank line after the formula zone, '-- ' delimiter before the signature) or as a solid line, depending on that you have chosen in Display settings 1 preferences.
Ⓐ The formula zone
This zone and its blank dividing line are obviously only present when you write a reply message. If you have chosen a reply formula in the settings, it will be displayed when the Compose window opens. You can freely edit this formula. You can even delete it if you have not quoted anything from the message to which you are replying (on the other hand, if you have quoted all or part of this message, it is recommended to leave a reply formula).
The formula zone inherits the line break corresponding to the number of characters indicated in the Preferences, but does not take into account the possibly different number at the top of the window.
Special case
When you write a replacement message (Supersede), the Compose window never contains a formula zone, even if there was a reply formula in the message to replace. In this case, the original formula is found at the start of the text zone and the drop-down list of formulas at the top of the window is inactive.
Ⓑ The message text zone
This zone does not have the same content when the window opens, depending on whether you are writing a new message or a reply message.
• New message ⇾ A simple empty line in which the cursor will be placed after you have entered a subject and pressed the Tab key.
• Reply Message ⇾ The quoted text of the message you are replying to, followed by two blank lines, with the cursor placed on the second to allow you to immediately write your reply.
The line break in the text zone is based on the number of characters displayed in the settings at the top of the window.
Drag and drop is possible inside this zone.
Ⓒ The signature zone
This zone contains, when opened, the signature that you chose when previously writing a message (provided of course that you have defined at least one signature in the Preferences). You can freely edit this signature, or even delete it (although common practice recommends the presence of a signature at the bottom of the messages you send).
The lines in the signature zone are trimmed to 80 characters, which corresponds to the maximum recommended length.
Drag and drop is not allowed in the signature zone.
Notes
• The three zones are in principle completely sealed (it is in particular impossible to make a selection straddling two zones) and their separations cannot be eliminated. If, despite everything, you notice an anomaly leading to the deletion of one of the separations, immediately type ⌘ Z to cancel the action that caused this deletion. Also remember to report this bug on fr.comp.sys.mac.communication (if you speak French) or on news.software.readers, so that the developer can remedy it.
• When you write a replacement message (Supersede), an additional zone appears at the very top of the input area. It contains the mention [Supersedes: <message identifier to replace>] which will be added at the beginning of your message. It is always separated from the following zone by a graphic line and cannot be modified or deleted.
5ᵒ The context menu of the input area
A right click in one of the three zones described above brings up a context menu, the content of which varies depending on the zone in which the mouse is pointing.
The common elements are:
Cut (grayed out if no text is selected)
Copy (grayed out if no text is selected)
Note that the shortcuts corresponding to the commands above (respectively ⌘ X and ⌘ C), as well as ⌘ A which allows you to select everything, only act on the zone in which the cursor is located, without extending over either of the other two zones.
Paste
Added to this are the commands already detailed in chapter 4.03. Message (reading):
• available without text selection: Open URL, Show image, Show message, Send email…
• available with text selection: Open URL, Show image, Show message, Send email…, Search with…, Translate with…, Encode or Decode in ROT13.
If spellchecking is enabled, additional items are available when right-clicking on a word underlined in red , selected or not.
If you have kept more than one dictionary in the Language and spell check preferences, the first item in the context menu will display the currently active dictionary and offer you a submenu to change it (this change is immediately operational).
One or more correction suggestions ⇾ Click on one of the proposed words so that it replaces the word underlined in red.
Learn ⇾ Saves the underlined word in the dictionary; it will no longer be considered incorrect.
Show correction dialog ⇾ Allows you to access additional correction options.
The Spelling Correction dialog
Reminder: As this dialog is generated by 4D, some of its elements are displayed in your system language.
This dialog box allows you to navigate through errors (real or supposed) encountered throughout the text, using the Previous and Next buttons.
For each word underlined in red in the text, several options are available to you:
• Learn ⇾ Save the word in the dictionary. It will now no longer be considered incorrect, even in other future messages checked in the same language.
• Ignore ⇾ The word will not be corrected but will no longer appear incorrect in the message currently being edited (however, it will be underlined again if it appears later in another message checked in the same language).
• Replace ⇾ The word will be replaced by the one present in the Replace with | input box. When correction suggestions appear in the list at the bottom of the dialog, the first of these suggestions is automatically offered in the input box, but you can edit it as you wish.
• Always replace ⇾ If the same underlined word appears several times in the text, all its occurrences will be replaced by the word present in the Replace with | box.
The dialog closes automatically when all underlined words have been processed (regardless of their processing). To close it manually, click the window close button or press Esc.
Ⓐ Additional item in the reply formula zone:
Clear reply formula.
Ⓑ Additional items in the message text zone:
Paste as quote ⇾ The (textual) contents of the clipboard are pasted with an angle bracket at the start of each line.
Commands for reducing and formatting quoted text
These optional context menu commands are detailed in the Processing quoted text section.
Ⓒ Additional item in the signature zone:
Clear signature.
6ᵒ Writing a new message
The Compose window for a new message has the following features:
• The title: New message (below: name of the first group in the Newsgroups field).
• The Subject field is empty when the window opens. You must enter a subject, after which press the Tab key will place the cursor in the text zone.
• The input area only contains an empty text zone and a signature zone.
When you have finished writing your new message; click on Validate. The message will then be placed, depending on the Save setting you have chosen, either in the outbox or in the drafts.
7ᵒ Writing a reply
The Compose window for a reply message has the following features:
• The title: '* In reply to' (below: pseudonym of the author and subject of the message being replied to).
If you click on this title, the message you are replying to will be displayed. If it was already open, its window will come to the foreground. Otherwise, it will open in a new window.
• The input area contains the following elements when the window opens:
– The formula zone.
– The text zone containing the quote from the text you are replying to (lines preceded by one or more angle brackets >), followed by two blank lines.
– The signature zone.
You can start writing your response where the input cursor is placed, that is, on the second blank line below the quoted text.
You can also, as we will see later, insert blank lines between two paragraphs of quoted text to insert your response elements.
Processing of quoted text
• If the cited text has multiple citation levels, as in the following example:
>>> Level 3 Quote
>> Level 2 Quote
> Level 1 Quote
the context menu of the text zone will present a submenu titled Quote level reduction. The items it contains vary depending on the case and allow you to reduce the cited text according to your wishes. In our example:
Delete last level will remove level 4 quote lines.
Delete levels 3 to 4 will only keep the level 1 and 2 quote lines.
Keep only the 1st level will only leave quote lines starting with a single angle bracket (these are generally the ones answered).
Note that after reducing the quote, there will still be some 'cleaning' to do. For example, if your initial reply message looked like this:
> Archibald wrote:
>
>> quote from Archibald
>> quote from Archibald
>
> quote from Milou
> quote from Milou
if you choose to keep only the first level, this will remain:
> Archibald wrote:
>
>
> quote from Milou
> quote from Milou
The mention 'Archibald wrote:' no longer needs to exist, since the corresponding quotation has disappeared. It will therefore be necessary to delete it manually, as well as the two lines of quotation without text which follow it.
• If the quote lines are longer than the default value defined in the 'Number of characters per line' preference (see chapter Display settings 1), you have two commands to reformat the quoted text.
Format hovered paragraph ⇾ Appears in the context menu when the mouse pointer is over a quote line whose length exceeds the default value.
This command will split the relevant citation line into several lines respecting the default length. This is particularly useful when replying to a message whose lines are not cut at all, with each quote line corresponding to a paragraph. Example:

could give this after formatting:

Format the lines of paragraphs in the selection ⇾ Appears when all or part of the quoted text is selected. Note that MacCafé will automatically adjust an incomplete selection (quoted portion of line not selected) or containing a portion of unquoted text.
Using this command, you can format one or more citation lines (or even the entire citation by first typing ⌘ A). If the paragraphs of the selected text are clearly demarcated, they will be rendered correctly. For example, to format lines of 120 characters into 72 characters, let's select all of the following text:

Here is the result:

This command also allows you to format a paragraph whose first line has been shortened. For example:

becomes:

If the formatting command you used does not give the expected result, you can undo it (menu Edit Cancel or ⌘ Z) and test the other command. You can also format the text cited in fragments, alternating the two methods if necessary, in the event that the paragraphs are poorly delimited.
You will find more tips on quoted text in section 9ᵒ.
• Validating the reply message
When you have finished writing your response; click on Validate. The message will then be placed, depending on the Save setting you have chosen, either in the outbox or in the drafts.
8ᵒ Cross-post and followup
A cross-post consists of publishing a single message on several groups (which is preferable to 'multi-post', that is to say the publication of several distinct messages with the same content). When making a cross-post, it is strongly recommended to add a followup to only one of these groups, that is to say that the replies made to the cross-posted message will be redirected to this single group. This is the purpose of the Followup-To field (often abbreviated to FU2). This avoids cluttering several groups with the same discussion, especially if it were to continue. If you omit the FU2, MacCafé will display an alert message during validation.
Avoid cross-posts pointing to groups of different hierarchies (fr.*, alt.*, francom.*, proxad.*, etc.), knowing that certain hierarchies are not distributed by all servers (in particular private hierarchies reserved for a company's clients).
The FU2 must point to one of the groups in which the message is published, and only one. MacCafé respects this rule to the letter and will not allow you to break it.
9ᵒ Tips and tricks
• When you have inserted a URL in your message, it turns blue. You can then do a ⌘ + click on it to transmit the address to your web browser. This will allow you to check that it does not contain any errors.
• It is recommended to surround URLs with angle brackets, like this:
<https://maccafe.fr/en/>
This will make them easier to detect in certain newsreaders.
• For the same reason, it is recommended to precede Message-IDs with the prefix news: and to surround everything with angle brackets; this is also the format in which MacCafé copies Message-IDs (see chapter 5. Main menu, section 3ᵒ). Example:
<news:r655r5$7l0$1@shakotay.alphanet.ch>
• When replying to a message, consider reducing the quoted text, retaining only the part you are replying to as much as possible. This can be done before writing, by selecting this part in the Message window before typing F (see 4.03. Message (reading), section 6ᵒ), but you can also process quoted text in the Compose window.
The Quote level reduction command allows you to remove "quotes of quotes", i.e. lines preceded by several angle brackets. As a general rule, it is better to avoid keeping several levels of quoted text, because with rare exceptions, they only hinder the understanding of your reply.
• You can also fragment the quote, so as to reply point by point by interspersing your answers between the cited parts:
> the first
> quoted part
lines of
the first
answer
> lines from
> the second
> quoted part
lines of
the second
answer
If the quote lines are too long and need to be formatted (see section 7ᵒ), it is best to do this after reducing and/or fragmenting your quoted text; this will save you from possibly having to start formatting again.
• When a discussion deviates from its initial subject, it may be useful to modify the Subject field, so that it reflects the new subject being discussed. However, it is recommended to do it according to the rules of the art.
Let's take an example. You participate in a discussion entitled Newsreaders and X-Face, and you notice that part of the thread focuses on a single newsreader, let's say (at random) MacCafé. If you would like to take part in this branch of the discussion, you can replace the Subject field in your reply:
Re: Newsreaders and X-Face
with this:
MacCafé and X-Face (was: Newsreaders and X-Face)
Some newsreaders (including MacCafé) will automatically delete the old subject when their users reply to your message. Their Subject field will become:
Re: MacCafé and X-Face
To make your task easier and to ensure correct wording, right-click on the contents of the Subject field and click Help formula "was:". All you have to do is enter the new subject in the dialog that appears, and MacCafé will complete it automatically. Finally click on Apply to validate the new subject.
If you prefer to modify your subject without the help of MacCafé, you will need to respect the following recommendations:
• avoid using any introductory word other than 'was:'.
• 'was:' must be written without a capital letter, without a space before the colon but with a space after it; if necessary, MacCafé will automatically correct these errors. In addition, it will warn you if you have forgotten the closing parenthesis.
• Finally, make sure to place the (was: [former subject]) at the end of the Subject field . For example, although it makes sense, this title is not appropriate:
MacCafé (was: Newsreaders) and X-Face
because this form, only MacCafé is a priori able to process it correctly. Other newsreaders will either skip nothing at all, or will only keep 'MacCafé'.
Among the newsreaders which automatically delete the string (was: [former subject]), in addition to MacCafé, we can cite Thunderbird and its forks, 40Tude Dialog, flnews, slrn, tin, Gnus and of course MacSOUP. There are surely others…
4.05.Pending messages

In the Profile window, the icon (Pending messages) is active when it has a red dot, which means that there are messages ready to be sent and/or messages saved in drafts. Clicking on the icon opens the Pending Messages window, which contains two tabs: Drafts (n) (n indicating the number of draft messages) and Outbox (n) (n indicating the number of ready-to-send messages).
1ᵒ What is the difference between draft and ready-to-send messages?
Technically, drafts and ready-to-send messages are messages waiting to be sent, which at this stage can still be edited or even deleted.
The difference between the two states is that a message ready to send is counted in the red dot of the icon ![]() (Send), and that it will actually be sent to the server when this icon is clicked; it will then disappear from the outbox. A draft, for its part, can remain stored indefinitely in the list of drafts, and cannot be sent until it has been transferred to the outbox.
(Send), and that it will actually be sent to the server when this icon is clicked; it will then disappear from the outbox. A draft, for its part, can remain stored indefinitely in the list of drafts, and cannot be sent until it has been transferred to the outbox.

In the image opposite, there are two pending messages, but only one is ready to send; the other is a draft.
2ᵒ The Drafts tab
This tab lists messages that have been saved in draft mode, with the following information:
• Written on ⇾ The date and time the draft was last saved.
• Distribution / Subject ⇾ The group(s) indicated in the Newsgroups field of the draft, and the subject of the message.
When you select a draft, the message body appears below the list.
→ Outbox moves the selected draft to the Outbox tab. This action will be prohibited (and an alert message will be displayed) in the following cases:
– the selected draft does not contain a Subject;
– the selected draft does not contain text entered by you (new blank message or reply containing only quoted text).
Edit opens the selected draft in the Compose window, where you can continue composing it. A double click on the selected message will produce the same action.
Delete permanently deletes the selected draft (you will be asked for confirmation).
3ᵒ The Outbox tab
This tab lists messages that have been saved as ready to send. The list has the same columns as those in the Drafts tab: Written on and Distribution / Subject.
When you select a message ready to send, the message body appears below the list.
→ Draft moves the selected message to the Drafts tab.
Edit opens the selected draft in the Compose window, where you can continue composing it. A double click on the selected message will produce the same action.
Delete permanently deletes the selected draft (you will be asked for confirmation).
To profile (active only in this tab) offers an alternative remedy in the event of a breakdown of the active profile server. If sending a message fails in this profile, the button allows you to transfer the message to another profile's outbox, provided that both of the following conditions are met:
– the target profile server distributes at least one of the recipient groups;
– the list of recipient groups does not contain any groups in which the target profile's server prohibits posting.
Otherwise, as the message would be refused by the server, MacCafé displays an alert and the transfer is canceled.
However, it is not essential to be subscribed to the recipient group(s) in the target profile for the transfer to be accepted.
4ᵒ Special features of the Compose window opened from the Pending Messages window
When you resume writing a pending message, two scenarios may arise:
• This is a new message to post in the group ⇾ The title of the Compose window will be 'Edit message'.
• This is a reply to another post ⇾ The window title will be '* Edit message'. A click on this starred title will display in a new Message window the message to which yours replies.
Aside from this title, the contents of the Compose window when it opens correspond exactly to what it contained when the message was last saved.
In particular, the status of the message (Ready to send orDraft mode) remains identical to that of the last recording. It will be up to you to change it in the event that from Draft mode you want its state to change to Ready to send (or vice versa).
In the Pending Messages window, the messages appear exactly as in the Compose window:
• For reply messages only, formula zone followed by a blank line or a separator line, even if the formula zone is empty.
• Text zone.
• Signature zone preceded by the delimiter or a separator line, even if the signature zone is empty.
However, if at the time of sending the formula zone is empty, it will not be included and neither will its separator line. The sent message will therefore start with the first line of the text zone. Likewise, if at the time of sending the signature zone is empty, neither the delimiter nor the signature zone will be included. In this case, the sent message will end with the last line of the text zone.
4.06. Purge

The Purge window opens by clicking on the button in the Profile window. It is used to create scripts which have the function of deleting messages from the MacCafé database, according to various criteria.
Caution!
The purge scripts are not linked to the active profile but to the database, which means that deleted messages will be deleted in all your profiles. It is better to take this point into account if you use one of your profiles for archiving old messages.
When the window opens, the list of purge scripts is displayed, but as it is empty when you open the window for the first time, we will first study the three other tabs which will allow you to create your scripts.
1ᵒ Script creation tabs
You can create purge scripts based on:
– the age of the messages,
– the From field of messages (pseudonym and/or email address of the author),
– the Subject field of messages.
The three tabs By Age, 'From' field and 'Subject' field have the same structure.
• On the left, the script creation area (with variable content depending on the tab displayed).
• On the right:
– The Group selection option displays the list of groups in which you will check those which will be affected by your purge script. You have the Select All and Deselect All buttons to facilitate these two actions.
– The Global option allows you to apply the script to all groups, both those you are already subscribed to and those you will subscribe to in the future.
• At the bottom, a row of buttons:
Close ⇾ Closes the Purge window.
If the script being edited is functional but not saved, you will be asked for confirmation and you can choose between Resume editing the script or Exit the purge. (If you change tabs under the same circumstances, you will be asked for the same confirmation).
If you have started the execution of one or more scripts, this will continue even after closing the window. The only way to stop the purge process is to click the Stop button in the small progress window of the running script.
Save ⇾ Prompts you to give your script a name, then saves it. The script will now be included in the list of the Scripts tab.
Run ⇾ Immediately performs the purge ordered by your script. This command does not save the script for future use.
Evaluate ⇾ When you click on this button, MacCafé estimates the number of messages that will be deleted according to the criteria established by the script. This number will be displayed on the button itself. It will vary depending on the groups selected in the list on the right.
2ᵒ Create a purge script by Age
Using the By Age tab is simple:
• You enter the age (in years, months and days) beyond which messages should be deleted. The corresponding date is displayed below. For example:

• Then you check in the list on the right the group(s) which will be affected by the purge (you can also choose the Global option). For example:

• Finally, you check or uncheck the following two options (they are checked by default):

Preserve locked messages ⇾ Messages that you have locked will not be deleted, even if they meet the purge criteria.
Preserve my messages ⇾ Posts you authored will not be deleted, even if they meet the purge criteria.
Let's take our example again:
• You chose to purge messages older than: 2 years 4 months 15 days.
• You selected the groups:
fr.comp.sys.mac.communication and fr.comp.sys.mac.materiel.
• You unchecked Preserve locked messages, but checked Preserve my messages.
The purge will apply to messages that are more than 2 years, 4 months and 15 days old, only for the two checked groups, with the deletion of locked messages but retention of messages you wrote.
• Once the criteria are established, you can Evaluate, Run and/or Save your script (see section 1ᵒ).
3ᵒ Create a script based on the 'From' field
In the 'From' field tab, you will be able to create a purge script based on the From field of messages , which contains the author's pseudonym normally followed by an email address.
• Start by searching for a pseudonym in the Pseudonym field. Pseudonyms containing your entry will be displayed in the pseudonym list.
• From the list, select the pseudonym of the person whose messages you want to delete. Its full From field will be displayed in the result field at the very bottom (below the options). For example:
Milou <milou@moulinsart.invalid>
• By default, the "From" field option is selected. This means that the purge will cover all messages that contain exactly the From field displayed.
If you select the Pseudonym only option, the purge will include all messages whose From field contains the selected pseudonym (the result field will no longer be visible). In our example, this will concern all messages whose author has the pseudonym Milou.
Attention !
If several people use this pseudonym, their messages will be deleted from the database. If you want to delete messages from just one person among these homonyms, the Pseudonym only option is not the most appropriate.
If you select the Email address option, only the email address contained in the From is displayed in the field result, and three additional choices are offered to you below the field:
Local part ⇾ In our example, only the milou@ part will constitute the purge criterion.
Email address ⇾ The whole address is taken into account: milou@moulinsart.invalid
Domain ⇾ Only the domain part is taken into account: @moulinsart.invalid
Finally, if you check the Editable option above the field, you will be able to freely enter your purge criterion: use only if you know what you are doing!
• Once your purge criterion has been established, all you have to do is check the group(s) that will be affected by the purge, or select the Global option.
• You can choose to enable or disable the Preserve locked messages option.
• Finally, you can Evaluate, Run and/or Save your script (see section 1ᵒ).
4ᵒ Create a script based on the 'Subject' field
The 'Subject' Field tab allows you to create a purge script based on the Subject field of messages, i.e. on a subject of discussion.
• The first thing to do is either to check the group(s) supposed to contain the messages to be deleted, or to select the option Global to take all groups into account.
• Next, start typing the target subject in the Start of subject… field. As you type, the Subject list updates. In case this update is delayed, you can click on the … button.
You can refine the search by selecting Starts with (the subject begins with the entered string) or Contains (the entered string can be at any position in the subject).
• Click on the subject that interests you in the list. It will then be placed in the Target subject area, where it can be edited if necessary; a possibility to use with caution!
When a subject is selected in the list, clicking on ? opens a Message window which displays one of the messages in the corresponding thread (the first if the selected subject does not start with 'Re:'). This allows you to consult, if necessary, the entire thread.
In case the message concerned has been cross-posted, a Group choice dialog will ask you to select a single group before opening the Message window.
• Then choose one of the following three criteria:
Complete Subject ⇾ Messages whose subject corresponds exactly to the character string present in the zone will be purged.
Subjet contains ⇾ Messages whose subject contains the string will be purged.
Sujet starts with ⇾ Messages whose subject begins with the string will be purged.
• Finally, check or uncheck the preservation options offered to you:
Preserve locked messages.
Ignore "RE: " at the start of subject ⇾ If you check this option, reply messages (to which 'RE:' is added before the subject) will also be purged. If you uncheck it, only the initial messages will be purged. This option is obviously unavailable if you chose Subject contains.
Keep the most recent one (by group) ⇾ This option is useful if you want to purge messages published periodically on groups, such as the Conseils d'utilisation or charters published on the fr.* hierarchy. It will allow you to keep, in each group, the most recent copy of the periodic message (see example no. 2 in the text box below).
• Finally, you can Evaluate, Run and/or Save your script (see section 1ᵒ).
Example 1: purge spam messages in a group
We want to delete a series of spam emails all with the same subject on a given group.
- Select the Selected Groups option, then check the relevant group in the list of groups.
- Enter the start of the subject in the input field (example found on the fr.comp.sys.mac group: 'Offre de pret') and click Starts with.
- In the Subject list, click the spam subject to purge.
- Choose Complete Subject.
- Check or uncheck the three message preservation options as desired.
- Evaluate your script, then save or run it.
Example 2: purge the 'Conseils d'utilisation' published each month in all fr.* groups
This example applies to the French-speaking hierarchy.
- Select the Global option.
- Enter the world 'conseils' in the input field and click Contains.
- In the Subject list, click on one of the subjects starting with '[Conseils d'utilisation]'.
- In the Target subject area, edit the subject to keep only the string '[Conseils d'utilisation]'.
- Choose Subject starts with.
- Check the Keep most recent (by group) option, in order to maintain the most recent version of the Conseils d'utilisation in each group.
- Uncheck Ignore "RE: at the start of subject" if you wish to keep any discussions in reply to Conseils d'utilisation.
- Check or uncheck the Preserve locked messages option as desired.
- Evaluate your script, then save it or run it.
5ᵒ The Scripts tab
It's the Scripts tab, as we have seen, which is displayed when the window opens.
• List of scripts
This list displays the scripts you have saved. You can order them by type or by name by clicking on the title of the corresponding column.
If the list contains scripts by age, they are displayed like this:
My purge script by age [2022/03/07]
The date in square brackets is the pivotal date of the script execution, updated based on the script settings. In the example above, if we run the script, messages posted before 200/03/07 will be purged, and messages dated 2022/03/07 or later will be retained .
• Selected script
To select a script, click it outside the checkbox column. The script description appears in the text box below the list. There you will find the parameters of the script, as well as the groups concerned.
To evaluate the number of messages targeted by the script, click Evaluate.
To start running the script, click Run.
When a script is selected, the following buttons (at the bottom of the window) are active:
Delete script (You will be asked for confirmation.)
Edit script ⇾ Open the script in the tab corresponding to its type — By Age, 'From' field or 'Subject' field —, so that you can modify it.
À noter
If you edit a script relating to a selection of groups after having unsubscribed from one or more of the groups concerned, MacCafé will remove these groups from the script and display an alert to inform you of this. In this case, when the tab allowing you to edit the script opens, the Save button will be immediately available.
However, if you have unsubscribed from all the script's target groups, you will not be able to save the script until you assigned at least one target group to it.
Rename script ⇾ Opens a dialog box where you can enter the new script name.
• Checked script(s)
You can check one or more scripts from the list. You can also check all the scripts at once by clicking on the All button (when all the scripts are checked, this same button becomes None and allows you to uncheck all scripts).
When you have checked one or more scripts, clicking on the Run checked button will launch their execution one after the other. Each time a script is executed, a small progress window is displayed, and when the execution is complete, the script is unchecked.
Clicking the Stop button in the progress window of the currently running script stops the purge completely.
As with messages deleted with ⌘ D, the M‑IDs of purged messages are remembered by MacCafé, so that they cannot not be recharged during a later message retrieval. This processing of M‑IDs can take time if you are purging a large number of messages; however, it is carried out in the background (a red dot comes to life on the button ![]() while it is in effect). If you exit MacCafé while processing has not finished, it will simply be suspended and continue the next time MacCafé is opened.
while it is in effect). If you exit MacCafé while processing has not finished, it will simply be suspended and continue the next time MacCafé is opened.
4.07. Search

The Search window opens by clicking on the button of the Profile window. It allows you to search for messages in the MacCafé database, according to the criteria you have chosen.
The window has three tabs: Search criteria, Message and Header which will be described in this chapter. When the window opens, or when the search results have been cleared, only the Search criteria tab is active.
Important note
The search is strictly linked to the active profile, that is to say it can only relate to the groups to which you are subscribed in this profile .
In the following sections, we will study the different stages of a search.
1ᵒ Establish search criteria
We start by defining the scope of the research:who are the authors involved? to which group(s) should the search be extended or restricted?
a. The Author list
All authors listed in the database (for the active profile) are displayed in the Author list. To narrow the search scope, you can:
• Select one or more authors. To cancel your selection, click Deselect All.
• Use the Author field and the criteria from the associated drop-down list: Starts with / Contains / Ends with. To return to the full list of authors, clear the contents of the Author field.
If filtering results in only one person being displayed, that person is automatically selected.
• Click the Me button, which will limit the search to messages you wrote. To return to the full list of authors, click Deselect All.
Notes
• If no author is selected, the search will be carried out on all authors (even if a reduced list is displayed).
• The Author input field is insensitive to case and diacritics (accents, cedillas, etc.). On the other hand, the list of authors takes them into account. For example, if you enter 'René' or 'rene' in the input field, authors whose pseudonym contains the forms René, Rene, rené, rene, even RENÉ or ReNé, etc. will all be listed and perfectly differentiated.
• You can use one or more wildcard characters (@) in the entered string. You will find in Appendix 8. Search and wildcards various examples of use of this wildcard.
b. The Groups list
The Groups list contains all the groups to which you are subscribed (in the active profile), and displays them in the same order as in the Profile window. To be able to launch a search, you must have selected at least one group. You can obviously select several, or even extend the search to all groups by clicking on Select all.
To select a group, simply click on it; it will then be checked. To deselect it, click on its name again.
To cancel all of your selections, click Deselect All.
The Newsgroups field allows you to restrict the contents of the list. For example, if you enter 'mac', only groups with 'mac' in the name will be displayed (note that typing in this field automatically deselects any groups you may have selected). To return to the full list of groups, clear the contents of this field.
If you have created separators in the Profile window, they appear in the list. When you check a separator, it automatically selects all groups below it, up to the next separator (or to the end of the list if the checked separator is the last one). If you uncheck it, these same groups are all deselected. In case only some of these groups are selected, the separator box will display a dash (-).
Note: As long as no group is selected, the Start search button is inactive.
We then choose the search mode to carry out: search in the body of messages or search in their header.
If you choose Body, MacCafé will search for words or character strings in the text of messages.
If you choose Header, a drop-down list appears giving you three possibilities:
• Extend search to all header fields (default -- All -- value, or no value).
• Choose one of the predefined header fields from the list.
• Enter another header field name in place of what is displayed.
It remains to determine what we are going to look for. To do this, we have the following tools:
Text to search: Here you can enter the text to search for in the body or header of messages.
The string (slow) or The words
– If you choose The string (slow), MacCafé will search its database for message bodies or headers that contain exactly the character string you entered. This research process can take time.
– If you choose The words, MacCafé will search for message bodies or headers containing all of the words you have entered, without them necessarily being side by side.
Which option to choose?
To help you choose the best option between The string (slow) and The words, here is some information and some examples.
• The The words option will not return any results if your input contains non-alphanumeric characters (punctuation marks, currency symbols, etc.), except for the at sign @ which plays the role of joker (see below).
• For both options, the search is case insensitive and accents are ignored. For example:
MacCafé will find MacCafé as well as maccafé or MacCafe.
• Examples of single-word searches
café
⇾ The string (slow) will be able to find café or cafe, but also maccafé, MacCafé, etc.
⇾ The words will only find occurrences of the words cafe and café.
control@ (only with The words)
⇾ is able to find control, but also controls, controlled, controlling, etc.
@control (only with The words)
⇾ is able to find control, but also uncontrol, miscontrol, etc.
@control@ (only with The words)
⇾ is able to find the same words as in the two previous examples, but also uncontrolled, uncontrollable, miscontrols, etc.
Given this use of the at sign as a wildcard character with the option The words, if you are searching for an email address, you will need to use the option The string (slow) for which an at sign remains an at sign.
• Examples of multi-word searches
well done
⇾ The string (slow) will find all occurrences of the complete string well done.
⇾ The words will find all messages containing both the words well and done, but these can be separated (for example, well in one paragraph, done in another) as well as juxtaposed.
well done!
⇾ The string (slow) will find all occurrences of the complete string well done!
⇾ The words will not find anything, because of the presence of the exclamation mark.
Note: The field Text to search and the options The string (slow) / The words are set independently in each search mode (Body and Header). When you launch the search, only those in the active mode are taken into account, even if those in the other mode are entered.
2° Research process
The Start search button is only active if the chosen criteria allow a search to be carried out.
In particular, the Text to search field must not be empty. There is, however, an exception: for a search in the header, if you have selected or entered a header field, you will be able to launch the search without having indicated any text to search. In this case, MacCafé will only search for messages that contain this header field, regardless of its content. Obviously, this possibility is only of interest for optional and rarely used header fields, such as Comments, Distribution or Keywords . On the other hand, avoid launching a search without text for a mandatory field like From or Subject, because it would be all of the messages in the database that would be found in the results!
When the Start search button is active, the search starts when you click it.
A small progress window appears. It has a Stop button that allows you to stop searching at any time. In this case, no results will be displayed. Note that this is the only way to interrupt the search before the process completes. Indeed, the Search window cannot be closed while a search is in progress.
3° Display and exploitation of results
a. The results list
Once the process is complete, the messages found are displayed in the results list located at the bottom of the window. If no message could be found, the words 'Search unsuccessful' appear as a watermark on the results list.
In the results list, you can order the messages by clicking on the title of the Author, Date or Subject columns.
b. The Message and Header tabs
As soon as the list contains results, the Message and Header tabs become active. When you click on a message in the list, the window switches, depending on the search mode chosen, to the Message tab or to the Header tab to display its content. The group in which the message was found is also displayed. The words or string you searched for are highlighted in the tab corresponding to the search mode you performed.
Regardless of the search mode chosen, it is always possible to switch from one to the other of these two tabs, either with the mouse or by typing the H shorcut. This shortcut is indicated by an (H) in the name of the inactive tab.
Both tabs have an Open message button that will display the message in a new Message window. (This can also be achieved by double-clicking on a message in the results list.)
4° Search in previous result
If you have already performed a search, you can activate the Search in previous result option by clicking on the Disabled button (which will become Enabled). So, if you launch a new search, only the messages found during the previous one will be taken into account.
You will then be entitled to two different colored highlights for the words found during the first search and those found during the next.
It is thus possible to chain searches independently of the mode chosen (body or header) for each of them. It is also possible to perform more than two chained searches.
4.08. Header data correction

If you notice one or more of the following errors in the display of a message in the List window:
• author name truncated or containing unexpected characters (due to incorrect encoding of the From field),
• inconsistent date and/or time,
• subject of the message truncated or containing unexpected characters (due to incorrect encoding of the Subject field),
you can correct these errors using the Header Fields command (accessible in the List window) which will display the window Correction of header data. This will allow you, for example, to obtain a correct sorting of messages, when you display them without grouping the threads and ordering them by author, by subject or by date.
The left part of the window displays the complete header of the message as it was recorded in the database, as well as the Message-ID and the name of the group from which you launched the command.
In the right part, the header fields that can be modified are displayed. For each field, the Header Data button allows you to fill the Alternative | entry zone with the original content of the field, whether to edit it or to reset it at any time.
For the Pseudonym (From) and Subject fields, the Alternative | input box can be filled freely. For the Date field, you will be prompted to enter a date in the format DD/MM/YYYY. For the UTC Time field, you can enter hours, minutes and seconds in hh:mm:ss format.
The Save button saves your modifications in the database and closes the window.
The Close button closes the window. Any modifications will not be saved.
Important notes
• Changes made in this window only affect the display of the message in the List window. The message header remains unchanged, which allows you to cancel your changes at any time by rerunning the Header fields command and restoring the original data from the message header using the Header Data buttons.
• If the message whose data you are editing was published to multiple groups, the changes you made will only appear in the list of the group from which you made them.
4.09. Text encoding correction

While the Header Fields command allows you to modify the defective header fields of a message, the Text Encoding command (accessible in the List window) can correct the body of the message if it contains unexpected characters.
To do this, MacCafé must first retrieve the message from the server. If the message is no longer on the server, the command will result in an alert message. If you have another profile created for a server that retains messages longer, you can try starting the operation again in that profile.
Once the message is retrieved, the Text Encoding Correction window opens.
The left part contains:
• The plain text of the message (which may display characters different from those expected, which is normal as no encoding is applied to it);
• a Result area, blank when the window opens, but which will fill when you click on one of the Apply buttons.
On the right are the following elements:
• Header ⇾ Contains the two header fields useful for correct encoding of the text:
– Content-Type: indicates the declared charset.
– Content-Transfer-Encoding: indicates the encoding method used in the message.
If one of these fields is empty, it is because it was not declared when the message was sent.
• Detected ⇾ Displays the charset (character set) and encoding method detected in the message header. By clicking on Apply, you will see displayed, in the Result area, the text decoded according to these criteria (therefore identical to what is displayed currently when you open the message in MacCafé). Note: if both fields in the Header section are empty, the result will not be displayed.
• Manual ⇾ Here you can combine the different charsets and encodings available, and click Apply to check their result on the text of the message.
To learn more about the character sets offered in the Charset list, you can consult this web page:
https://www.iana.org/assignments/character-sets/character-sets.xhtml
When the text displayed in Result looks correct, you can click Save. The correction of the message will be saved in the MacCafé database and the window will close.
When you click Close, the window closes without saving the correction.
Example of correcting a message
Excerpt from a message for which no charset and no encoding were specified in the header:
> D'autant que reÁu et lu sur Windows, Áa s'affiche correctement.
Et l‡ ?
After applying, in Manual, the charset ISO-8859-1 and encoding 8 Bit, the Result area displays this:
> D'autant que reçu et lu sur Windows, ça s'affiche correctement.
Et là ?
Mission accomplished!
4.10. About MacCafé…

Accessible from the MacCafé menu, the About MacCafé… window brings together information that may be useful to you. Here are the main ones:
• The number and date of the version of MacCafé you are using,
• A link to the MacCafé website,
• The path to the folder in which MacCafé data is stored (database and settings).
• A table of information about your active database,
• A button to open this Documentation (see chapter 4.12 Documentation). Clicking this button also closes the About… window.
• A button allowing you to display a History (in French) of MacCafé versions.
The history only takes into account versions published since the last major update (version 3.0 currently). To find the complete history of MacCafé since its very first public version, see the History menu of the MacCafé website.
Note : As indicated on the button, the history is not translated. You will find an English summary of the latest changes at the top of the Documentation page.
4.11. Documentation
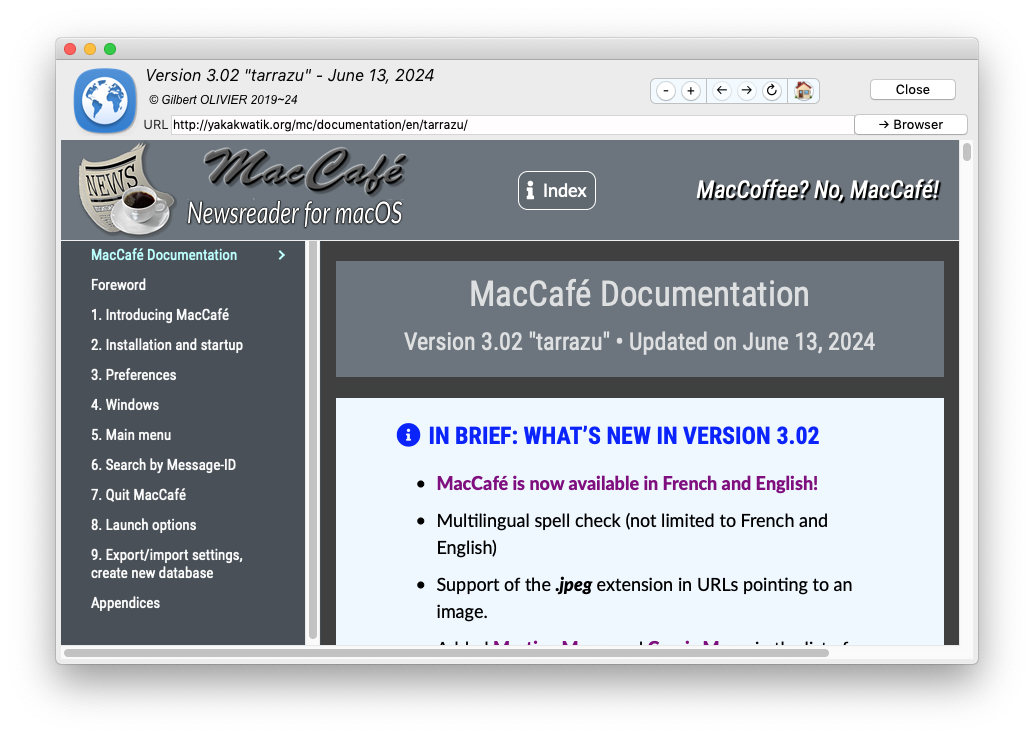
This documentation can be opened directly in MacCafé by three means:
– click on Documentation in the About MacCafé… window
– in the main menu of MacCafé, click on Windows Documentation
– press ⌘ ? (equivalent to ⇧ ⌘ , )
Let’s see how the Documentation window looks…
1ᵒ The upper banner
• ⊖ and ⊕ are zoom commands (reduce/enlarge) that act on the web page.
• , and provide access to classic web browser commands, respectively Go to previous page, Go to next page and Reload current page.
• 🏠 allows you, when a link from the page has taken you to another website, to return directly to the documentation and refresh it.
• URL displays the address of the web page currently displayed (which can be, as we will see, another page than that of the documentation itself).
• → Browser opens the web page currently displayed in your browser and closes the Documentation window. If you want to keep it open, press the ⌥ key and click on the button.
2ᵒ The web area
This area contains the actual documentation. All links, whether to part of the document or to another website, are fully functional (except for links that attempt to open in another window, but the documentation itself contains none).
It is possible to select and copy all or part of the page content to the clipboard: ⌘ A to select all, ⌘ C or menu Edit Copy to copy the selection.
The context menu partially repeats that of the Safari browser.
• Right click on a blank area of the page:
Reload ⇾ Refreshes the page content and reloads external resources (style sheets, etc.). This command is more complete than that of the button which only refreshes the content. We recommend that you systematically launch it the first time you open the documentation after updating MacCafé. It is also advisable to launch it regularly, in order to benefit from any corrections made to the documentation between two updates.
Save Page As… ⇾ Saves the web page to the location of your choice.
Print… ⇾ Web page print command. Warning! Do not use this command, otherwise you will waste a lot of paper with deplorable results.
Inspect element ⇾ Opens a simplified version of the Safari Inspector.
• Right click on a word or a selection of text:
Search […] ⇾ Opens the macOS Dictionary to search for the selected word or text.
Search [search engine] ⇾ Opens Safari to search for the word or selection in the browser's default search engine.
Copy ⇾ Copies the word or selection to the clipboard.
The Share, Speech, Services submenus are identical to those in found in the context menu of Safari. We also find the commands Save Page As…, Print… (same warning as above) and Inspect element.
Note: While MacCafé allows you to follow links to web pages external to the documentation, it can only do so within the Documentation window. Therefore, the Open link in new window command from the context menu will give the same result as the Open link command: the link will open in the Documentation window. Likewise, a hyperlink designed to open a page in a new window will open it in that same window.
3ᵒ The index
To make your research easier, the documentation has an index. This opens in a separate page when you click on the Index button located in the middle of the -head. The index page has a Doc button placed in the same place to return to the documentation.
To browse the index, simply click on the letters of the alphabet at the top of each section. Each entry in the index has one or more links pointing to the passage(s) of documentation corresponding to that entry.
4.12. Message filters


The Message Filters window opens by clicking on the button. of the Profile window. It allows you to create filters which will be used during retrievals, in order to apply various actions to the messages concerned. You will find concrete examples of filters at the end of this chapter.
Reminder: When this window is open, the Fetch news button is inactive and auto-retrieval is disabled.
When the window opens, the list of filters created is displayed, but as it is empty when you open the window for the first time, we will first study the Filter tab which will allow you to design and edit your filters.
1° The Filter tab
a. The name of the filter
The first thing to enter is the name you want to give to your filter. This name will be entered in the Name: | field. Please note: You will not be able to save your new filter if you give it the exact same name as a filter already in the list.
b. The conditions
You will then define the condition(s) necessary for applying the filter. A condition is made up of three elements: a header field, a test and a value. Some examples:
Subject | contains | MacCafé
Newsgroups | doesn't start with | fr.
Followup-To | is | poster
Choose from the Field drop-down list the header field on which the condition will apply. The list contains the most commonly used fields, but you can enter a field name that is not there, such as Approved, Keywords, Summary, etc.
Choose one of the following items from the Test drop-down list:
- contains / doesn't contain ⇾ the header field contains / does not contain the character string chosen as value.
- starts with / doesn't start with ⇾ the string is / is not at the beginning of the field content.
- ends with / doesn't end with ⇾ the string is / is not at the end of the field content.
- is / is not ⇾ the string is/is not the exact contents of the field.
Finally, enter the character string to test in the Value | field.
IMPORTANT NOTES
⓵ The Value | input field takes into account and differentiates any type of character (upper and lower case, accented characters, emojis, etc.).
For example, if you create the following condition:
Subject | contains | MacCafé
only messages whose Subject field contains exactly the form MacCafé will be filtered. On the contrary, if the Subject field contains MacCafe or maccafé, there will be no filtering (unless you create additional conditions for these spellings).
This particularity is important when it comes to distinguishing, for example, two very similar pseudonyms like Gérard or Gerard. In return, in certain cases it will require creating several conditions to take into account the different spellings of a word (see example 3 given at the end of the chapter).
⓶ The From, Subject, Organization and Sender fields may take a different form depending on whether they are displayed in the header panel of the Message window or in the raw message header (obtained by typing H). One reason may be the text encoding, but it is not the only one.
To construct a condition based on one of these fields, you must use the form such as: it is displayed in the header panel, not that of the raw header. Example:

Note that in this example, the Subject field also appears in two different forms. It is the one in the header panel (at the top) that is usable.
Finally, click on the Add button. The condition will be displayed in the Condition(s) list.
You can also reset the condition edit box by clicking Clear.
Note: The Add button is only active if the Field | Test | Value condition is complete. There are, however, two cases where the Value | input field can be left empty:
- You have chosen an optional header field and the test is. In this case, the condition means that the chosen field is missing from the header. For example: Approved | is | [no value] means the message does not contain an Approved field. The Value field will look like this:
⟹ The field is missing.
- You have chosen an optional header field and the test is not. This time, the condition means that the chosen field is present in the header. For example: Keywords | is not | [no value] means the message contains the Keywords field. The Value field will look like this:
⟹ The field is present.
This obviously cannot apply to mandatory header fields (Date, From, Message-ID, Newsgroups, Path, Subject), for which MacCafé will require the presence of a value.
If you need to add other conditions, repeat the steps above. Your new conditions will be added to the list.
When a condition has been added to the list, right-clicking on it displays a context menu allowing you to edit or delete it. If you choose Edit, the Field, Test and Value elements of the current condition are displayed and the Add button becomes Replace.
c. How the filter is applied
You can choose how the filter will be applied:
All conditions are validated ⇾ Messages will only be filtered if they meet all filter conditions.
At least one condition is validated ⇾ Messages only need to satisfy a single filter condition for them to be filtered.
See the filter examples at the end of the chapter to better understand the benefits of each of the two modes.
d. The action to perform on filtered messages
The drop-down list allows you to choose which action will be performed on each message affected by the filter:
- Check ⇾ The message is checked.
- Auto-check ⇾ The message is checked, and if it generates a thread or a sub-thread, the messages that follow will be automatically checked.
- Ignore ⇾ The message is marked as read upon retrieval and is assigned the pictogram . You can choose the color of the pictogram by clicking on the Picto color button .
- Auto-ignore ⇾ The message is marked as read upon retrieval and is assigned the pictogram (here too, you can choose the color of the pictogram). If this message generates a thread or a sub-thread, the messages that follow will automatically be marked as read and will be marked with a ━ sign.
- Tag ⇾ This action highlights the message by giving it the pictogram . You can choose the color of the pictogram by clicking on the Picto color button .
- Delete ⇾ The message is deleted upon retrieval.
e. Filter scope
• If you choose Selected groups, you will need to check in the list of groups those which will be affected by the filter. The principle is the same as for purging; in particular, all the groups to which you are subscribed, all profiles combined, are present in the list.
• If you choose Global, the filter will apply for all groups you are subscribed to at the time of filtering, that is, if you subscribe to new groups, these will be automatically taken into account during future retrievals.
f. Saving the filter
When your filter is operational, the Save button becomes active. By clicking on it, you switch to the List tab where you will find your new filter, added at the bottom of the list.
By clicking on Cancel, you also switch to the List tab, but the filter is not saved.
2° The List tab
The filter list itself contains four columns:
• The filter activation column, in which you can check the filters you want to make active, or uncheck those you want to temporarily deactivate. Only checked filters will be applied during recoveries. When a new filter is added to the list, it is unchecked by default.
• The Name column displays the names you entered for your different filters.
• The Action column indicates the action to perform for each filter.
• The Scope column indicates whether the filter has a global scope or limited to a selection of groups.
Filters can be moved in the list by drag and drop. Their position is memorized by MacCafé.
Caution!
• The order of the filters is important because it is the one that will be used during retrievals. Each message can only have one filter applied to it, so if the message meets the conditions for a given filter, the corresponding action is applied to it and subsequent filters are ignored for that message.
It is strongly recommended to place filters with 'positive' action (check, auto-check, tag) at the top of the list, that is to say above filters with 'negative' action (ignore, auto-ignore, delete). This will allow you to preserve the messages of the authors you follow, since they can never be affected by a negative action (see the examples at the end of the chapter).
• The Auto-check and Auto-ignore actions being contradictory, they cannot be applied simultaneously to a message or a series of messages. In such a case, priority is given to the first action executed. So:
- An Auto-ignore type filter will not be applied if the thread or subthread concerned is already auto-checked (whether this auto-checking was carried out manually, via the Message Retrieval or by a previously applied filter).
- Conversely, an Auto-check type filter will not be applied if the thread or subthread concerned is already auto-ignored.
A right click on a filter displays a context menu containing the following commands:
Edit (see section 3° below). This command is also accessible by clicking on the Edit button.
Delete. This command is also accessible by clicking on the Delete button. In both cases, you will be asked for confirmation.
Enable all filters
Disable all filters
The Duplicate button (which has no equivalent in the context menu) allows you to create a copy of the selected filter which will serve as a basis for editing a new filter:
- The copy of the selected filter is added at the bottom of the list, unchecked, with the mention (copy) at the end of its name.
- The Filter tab automatically opens to allow you to edit this new filter.
When you select a filter, its detailed operation is displayed below the list. It includes all the elements chosen when editing the filter: Conditions, Application, Action, Groups.
3° Edit an existing filter
When you launch the Edit command in the List tab, the window switches to the Filter tab where the filter is loaded and you can modify its configuration as you wish.
Once the changes have been made, click Save to validate them, or Cancel to keep the old version of the filter.
4° Some examples of filters
Any resemblance to real persons, living or dead… etc. 😉
• Example 1: highlighting authors
This filter will tag the messages of the authors you wish to follow, that is to say assign them a pictogram in the color of your choice.
The chosen application mode is necessarily At least one condition must be validated.
If we want to ensure that the messages concerned cannot be affected by a negative filter, we will place this positive filter at the top of the list.

• Example 2: filter 'undesirable' authors
Unlike the previous filter, this one will perform a negative action (here Ignore, but it could also be Auto-ignore or Delete) on the authors covered by the conditions. We can thus obtain a complete kill-file which fits into a single filter. Note the special case of the third condition: in the case of a 'chameleon' author who regularly changes his pseudonym, it is not the From field which is tested, but another field which allows to identify this author.

• Example 3: highlight discussion topics
As in example 1, this filter will tag messages whose subject interests you.
Note the presence of the forms MacCafé, maccafé, MacCafé and maccafe, made necessary by the sensitivity to capital letters and accents of the value entry field.

• Example 4: filter cross-posts without Followup-To
In this filter, testing for the presence of a comma in the Newsgroups field allows you to check if the message has been posted to several groups. As for the Followup-To field, we check that it does not exist using the is test without entering any value.
Here, it is important that both conditions are validated, hence the choice of application mode.

• Example 5: Filter messages with followup to a given group

• Example 6: Automatically delete replies from the fr.test robot
Note that for this filter based on a single condition, the choice of application mode has no importance.

• To conclude, here is the carefully ordered list of our filters. Remember that when a filter is applied to a given message, the filters following in the list are not tested for this same message.
The 'favorite authors' filter is placed at the top of the list, so that messages from relevant authors cannot be affected by negative action. For example, if one of the authors we follow followed to junk, his message would not be ignored as stipulated by the 'follows to avoid' filter, and it would not lose its color pictogram.
The order assigned to the other filters is a matter of personal choice. Here, we considered that the filters leading to deletion should have priority over the following filters, but we could just as easily decide otherwise (for example to ensure that the message from an 'undesirable' dealing with one of our favorite topics is not deleted). It's up to everyone to adjust the order of their filters according to their preferences.

Case of groups without subscription
If you have created a filter for a selection of groups, it may happen that certain groups in this selection are no longer available on any profile, because you unsubscribed from them after creating the filter. However, these missing groups are not deleted from the filter, because you could resubscribe to them later. They appear:
- crossed out in filter details (List tab)

- mentioned in the Unsubscribed Groups list (Filter tab)

You can, if you wish, delete them manually:
In the Unsubscribed Groups list, right-click a group to delete, and then click Delete group [group name] .
or
In the Unsubscribed Groups list, right-click a group and then click Delete All Groups.
For further…
Other examples of filters are presented to you in Appendix 9. Some tips.
6. Search by Message-ID

Principle and procedure of the Message-ID search
MacCafé allows you to search for a message for which you know the Message-ID (this term, commonly abbreviated to 'M‑ID', refers to the unique identifier in the message header).
This research can have various starting points.
• From a Message window:
- Right click on an M‑ID, then click on Show Message (item also available in the context menu of the Compose window).
- Click on one of the buttons or indicating that the message displayed is a reply to a message posted on another group and has a Followup-To field.
- In the graphical representation of the thread, click on the gray circle representing a 'ghost message', that is to say a message which, although referenced in the thread, is absent for one reason or another.
• From the Edit menu Search by M‑ID…. This command opens a dialog that allows you to paste or enter the M‑ID of the message to search for. The following three formats are accepted:
- <news:r655r5$7l0$1@shakotay.alphanet.ch>
- <r655r5$7l0$1@shakotay.alphanet.ch>
- r655r5$7l0$1@shakotay.alphanet.ch
Whatever its origin, the M‑ID search is carried out in one, two or three steps depending on the case:
- Search for the message in the MacCafé database. Note: This step will be skipped if it is obvious that the message is missing from the database (for example when we clicked on a button ).
- If the message is not in the database and if you have activated the search option NNTP servers (see the section 3ᵒ of chapter 3.10), sending a request to your news server (or to your servers, one after the other until the message is found) to search for the message.
- If the message is also not on the server(s) or if the NNTP servers option is disabled, launch the search on a Web archive site, again provided that you have activated this service (see section 3ᵒ of chapter 3.10).
Step 1 - Searching for the message in the database
When the M‑ID corresponds to a message present in the MacCafé database, this message opens in a new Message window.
If you are using multiple profiles, the message for the M‑ID may not be in a group in the active profile. In this case, you will be notified in the following way: if the active profile is named Profile 1 and the message is in a profile named Profile 2, the name Profile 2 will be displayed with a red background at the top of the Message window. If you reply to the message, your reply message will be saved in Profile 2's outbox.
If the message corresponding to the M‑ID has been cross-posted (that is to say published simultaneously on several groups), a dialog will ask you which instance of the message you want to open. Here again, you will be able to open an occurrence of the message which is in a profile other than the active profile, under the same conditions as above.
Step 2 - Searching for the message on the server: the 'Online' Message window
The search on the NNTP server(s), if enabled in the Preferences, is launched when the message corresponding to the M‑ID was not found in the database.
In the Search message by its M‑ID dialog (see the screenshot at the beginning of this chapter), the list of available servers is displayed, identical to that proposed in the Search engines preferences. This allows you to edit this list before launching the search.
• Dragging and dropping servers from the list allows you to choose the order in which they will be queried. For example, you might decide to query the server with the longest retention time first.
• The check boxes in the Active column allow you to enable or disable searching on a particular server. It may be helpful to temporarily disable a server when you know it is down or undergoing maintenance.
These choices will be remembered for future searches, and will be reflected in the Preferences list.
If the desired message was found on a server, it will open in an ’Online’ Message window which has some differences from standard Message windows. Please note that the message thus presented is only intended for consultation: you cannot reply to it and if it is one of your messages, you cannot cancel or replace it from this window. However, under certain conditions, you can save the message in the database, which will make these actions possible.

1. Instead of the graphical representation of the thread, the list of M‑IDs possibly present in the References field of the message is displayed. By default, M‑IDs are ordered from newest to oldest (which places the message to which the displayed message replied to at the top of the list), but it is possible to reverse this order by clicking on the column title Order.
This is obviously a partial representation of the row: messages published after the displayed message cannot be included, and even the list of those which preceded it may be incomplete, some newsreaders imposing a limit on the number of Message-IDs in the References field.
The Db column provides information on the possible presence of each message in the list in the MacCafé database: we will read yes if the message is found in the database, --- otherwise.
2. On the right is an information frame where the origin of the research is entered (see the starting points mentioned at the beginning of this chapter).
Below this frame is placed a button. When the window opens, it is called Search and it is inactive. It is only activated when you select a Message-ID from the list on the left. It will then change its title and become:
 if the selected M‑ID corresponds to a message present in the database (yes in Db column). In this case, a click on the button will open the message corresponding to the M‑ID in a standard Message window, as in step 1 .
 if the M‑ID corresponds to a message missing from the database (--- in Db column). A click on the button will display the following menu:
Archive website (grayed out if no site is defined in Preferences) ⇾ Starts searching for the message on the web archive site you have chosen (see step 3 ).
All servers ⇾ Starts searching for the message on the servers used in your profiles.
Added to this is the list of servers you are using, to allow you to launch the search on a server of your choice.
Tip: If you know that one of the servers you are using is down or under maintenance, avoid running the All Servers command, because the query sent to this server will not succeed and will waste your time. Instead, search on another server in the list.
The Save to database button allows you to add the viewed message to the active MacCafé database, provided that you are subscribed to at least one of the groups present in the Newsgroups field of this message (otherwise, the button is inactive). Once the message is saved, it is displayed in a standard Message window.
- If it is an isolated message (empty References list) or if it is the only one in the sequence to be absent from the database (all entries in the References list display yes in the Db column), the 'Online' Message window closes automatically.
- If the References list is not empty and contains M‑IDs not present in the database (--- in the Db column ), the 'Online' Message window remains open, allowing you to search for and save messages corresponding to these M‑IDs if you wish. To do this, you will need to start by saving the oldest message (the lowest in the list in default order), to avoid the thread being separated into several unrelated pieces, or even the messages becoming completely isolated.
3. The other elements of the window (the button , the header panels and of the message body as well as the context menu) are similar to those of a standard Message window, minus the reply, cancel and supersede commands.
Several 'Online' Message windows can be opened at the same time. In the Windows Online Messages menu, they are referenced with the MSG prefix.
In 'Online' Message windows, messages with multiple content (multipart) are treated in the same way as in Message windows (see the text box in chapter 4.03).
Step 3 - Searching for the message on an archive website: the Web Archive window
If steps 1 and 2 did not produce any results and you have activated the search on an archive website (see section 3ᵒ of chapter 3.10), a Web Archive window opens to display the search result on the website you have chosen.
As with the 'Online' Message windows, it is possible to have several Web Archive windows open simultaneously. In the Windows Online Messages menu, these windows are referenced with the WEB prefix.

1. The upper banner
• Site to query displays the list of available archiving sites. It allows you to submit the same Message-ID to another site. This can be useful if, for example, the search gave no results on the default site.
• ⊖ and ⊕ are zoom commands (reduce/enlarge) which act on the web page displayed under the banner.
• , and provide access to classic web browser commands, respectively Go to previous page, Go to next page and Reload current page.
• M‑ID of the message searched for displays the Message-ID of the message you searched for.
• URL displays the address of the currently displayed web page.
• The button opens a pop-up menu containing the following items:
Copy <URL> ⇾ Copies the URL framed in angle brackets to the clipboard (recommended format if the URL needs to be pasted into a message to be published on Usenet).
Copy URL ⇾ Copies the URL without angle brackets to the clipboard.
'Online' Message window ⇾ Displays the message in an 'Online' Message window (see step 2), which will allow you to access the functionalities offered by this window. This item is grayed out if the search did not result in the display of a message, or if the web search is carried out via a personalized URL which does not point to one of the predefined sites.
Tips
• This command is particularly useful when the message displayed in the Web Archive window has encoding defects, because these defects will be corrected in the 'Online' Message window. For example:

• In the Search engines preferences, you have an option to automate the duplication of the message in an 'Online' message window, and possibly close the Web Archive window.
All servers ⇾ Starts searching for the message on the server(s) you are using.
As in the 'Online' Message window, you can also launch this search on a single server of your choice, using the list that appears under this item.
Obviously, at this stage, searching for the message on the server(s) only makes sense if it is disabled in the Preferences. Otherwise, it has already taken place and has not produced any results, since you have reached the third step…
2. The web area
The page displayed in the web area is fully functional, that is, you can follow the links displayed there.
It is possible to select and copy all or part of the content of the page to the clipboard: ⌘ A to select everything, ⌘ C or Edit Copy menu (or Copy in the context menu of the page) to copy the selection.
The context menu contains other items, particularly concerning text search, which are identical to those found in the Safari context menu.
Note: If MacCafé allows you to follow links to pages other than the one displayed, it can only do so inside the Web Archive window. Therefore, the Open link in new window command from the context menu will give the same result as the Open link command: the latter will open in the current Web Archive window. Likewise, a hyperlink designed to open a page in a new window will open it in that same window.
Tip
If you searched on the 'howardknight' website (see screenshot above), the web page has a View for Bookmarking link which opens a new page containing the source code of the displayed message. In the URL of this new page, the Message-ID is replaced by a simple identification number of the message in the archive. For example:
http://al.howardknight.net/?MSGI=%3Cs86in0$l2s$1@news.trigofacile.com%3E
becomes:
http://al.howardknight.net/?ID=162590839700
If you want to include the URL of the message in an article that you publish on Usenet, it may be advantageous to use this shorter form.
7. Quit MacCafé
You can quit MacCafé like any Mac application, the only difference is at the end of this command the appearance of an 'ad' window from the 4D company.
This window is not blocking, closes after a few seconds or immediately if you click on it.
Warning!
In four cases, there may be a dialog asking for confirmation to exit, even though this does not happen from the application:
• From the context menu of the MacCafé icon in the Dock, only if MacCafé is not in the foreground;
• From the Activity Monitor application with the Quit command;
• For the Restart and Exit commands from the menu, where this dialog blocks the requested procedure.
• When the system update requires a reboot, which will be blocked by the confirmation dialog. It is therefore recommended to exit MacCafé before launching a macOS update, knowing that you will not necessarily be in front of your computer when the system has to restart.
Note that in these cases, if a message is being written at the time of closing, it will be lost.
8. Launch options
When you launch MacCafé, the application systematically opens the last used database. However, 4D offers the ability to choose other options at launch. To access it, here is how to proceed:
Press a ⌥ key when launching MacCafé and keep it pressed until the following dialog appears:

This dialog displays in the language set in your system preferences. The screenshot above applies to an English system.
1ᵒ Open the application with the default data file
When you click on Continue, MacCafé launches by opening the default database, according to the standard procedure.
2ᵒ Select another data file
This option allows you to open another database (previously created) than the default database. When you click Continue, a file opening dialog appears. Navigate to the folder containing the database you want to open, then select the .4DD format file there and click on Open.
MacCafé will then launch by opening the base you have chosen, which will become the default base.
3ᵒ Create a new data file
With this option, you can create a new database, which will be up to you to configure and which will become the default database. When you click Continue, a file creation dialog opens.
Caution! The path proposed by default is the MacCafé.app application's internal database folder. Do not create your new database in this location. Instead, navigate to your Documents folder (or an external writable drive) and create a new folder there before clicking Save.
Once the new database has been created, MacCafé generates a protection key and displays a dialog box allowing you to view and personalize it. If you wish to be able to cancel or replace messages posted from another database, it is essential to assign to your new database the key already used in this other database. Read chapter 3.02. Message protection key for more information.
This standard 4D dialog has some drawbacks, like the one presented in the previous text box. Since version 3.0, MacCafé allows you to perform actions 2° and 3° after opening the application and in a more practical way, thanks to the commands of the File menu Open database…, Open recent database and Create database.
If you create several databases, it is recommended to give them different names, even if you save them in separate folders. This will avoid possible confusion, particularly when using the Open recent database command.
4ᵒ Restore a backup file
This 4D function, which is of little use or even useless for MacCafé, will not be documented here. If you still want to know more, you can refer to the official 4D documentation, by clicking on the Online documentation… button in the Tools preferences.
5ᵒ Open the Maintenance and Security Center
While waiting for chapter 3.14. Tools to be updated, we recommend that you do not use the MSC tools if you are not familiar with the 4D environment.
The Cancel button in the dialog causes the process to close (without changing the default base), after a brief display of the 4D advertising window.
9. Export/Import settings, create new database
Since version 3.0, MacCafé has been equipped with commands that make it easier to manage its databases, without having to use the external tool offered by 4D (see chapter 8. Launch options) which is a bit limited. They are grouped in the File menu.
IMPORTANT
If you exported the settings of a database in a version prior to v.3.02, importing the Display Settings 1 preferences will no longer work, due to modifications made to these preferences. To remedy this, simply launch a new export of the settings from this database.
1° Export settings
The File Export settings menu item exports the settings of the active database, to allow you to import them later into another database, or to select them when creating a new base (see section 3° of this chapter).
The export files are saved in an export folder named [Database name] Export Réglages, placed in the folder that contains the active database. If you subsequently export the settings of the same database again, these export files will be overwritten and replaced by the new ones.
The following settings are exported:
- All profiles (Profile preferences data only, list of available groups and group subscriptions are not exported).
- Preferences Message protection key.
- Preferences Add custom message header fields (extra header fields, X-Face, Face).
- Preferences Reply formulas.
- Preferences Signatures.
- Preferences Display settings 1.
- Preferences Display settings 2.
- Preferences Author filtering.
- Preferences Search engines.
- Preferences Message retrieval (except settings regarding automatic retrieval).
- The setting Message deletion validation (present in the Tools) preferences.
- Message filters.
- The validity of email addresses recorded in the database.
2° Import settings…
The File Import settings… menu item allows you to import the settings of your choice into the active database, from an export folder previously created according to the procedure described above.
Once the folder is chosen, MacCafé checks that all the files necessary for import are present there, and if this is the case, it displays the following dialog:

Each row in the table specifies whether the settings to be imported will replace the corresponding existing settings or if they will be added to them.
When you select a row, explanatory text is displayed below the table, to tell you which elements will be imported, and how they will be imported. We recommend that you read this text carefully, for each type of settings you wish to import.
To choose a setting to import, simply check it (the corresponding line is automatically selected, to allow you to read the corresponding explanatory text).
The Activate all button checks all lines, except the Profile - 1 only line. Instead, the Profiles - All line is checked. The latter will be unchecked if you check Profile - 1 only (which will open a dialog allowing you to choose your unique profile to import).
When you have checked all the settings you want to import, click Import to start the import.
Note
• The imported profiles are 'blank', that is to say that the list of groups must be retrieved so that you can subscribe to the groups of your choice.
• Imported filters are added to the bottom of your filter list (if it is not empty) and are disabled. It's up to you to order them if necessary and activate the ones you want to use.
3° Create a new database
Reminder: If you create several databases, it is recommended to give them different names, even if you save them in separate folders. This will avoid possible confusion, particularly when using the Open recent database command.
The File Create database menu item gives access to the two commands described below.
Default settings…
This command opens a dialog in which you will choose the name and location of your new database, as well as its protection key (it is the key of the active database which is proposed by default, which will save you time if you want all your bases to have the same key).

Enter the name of your new base.
Click on Choose folder… to define the location of your new database.
If you wish, modify the protection key offered to you.
Click on Create to validate your choices and start creating the database.
The Create button is only active if the three necessary data (database name, folder and protection key) are present. Furthermore, if a database with the entered name already exists in the chosen folder, a warning will be displayed and the Create button will remain inactive as long as you have not modified your choice.
MacCafé then creates the new .4DD file, closes then restarts by opening the new database and displaying its Profile preferences.
With import of settings…
This command opens the following dialog:

In the Paths & Key, you will choose:
- the name of your new database,
- its location,
- its protection key (here again, the key proposed by default is that of the active database),
- the folder where the settings to import are located (see section 1° of this chapter).
When you have chosen a settings folder, the Settings (n) tab becomes active (n indicates the number of selected settings to import).

There you can select the settings you want to import into your new database. Its content and operation are similar to those of the dialog described in section 2° Import settings. Only the protection key is not among the available settings, because it is already defined in the Paths & Key.
The Create button is only active if you have completed all the elements of the Paths & Key and checked at least one setting in the Settings (n) tab. When you click on this button, MacCafé creates the new .4DD file, closes then restarts by opening the new database. If you have not imported a profile, the Profile preferences will be displayed, otherwise it will be the window of the first imported profile (blank window because, remember, the list of groups is not taken into account in the export/import of settings).
Appendices
Here you will find additional information on MacCafé in particular, or on Usenet in general.
On the menu:
- Appendix 1. List of shortcuts and keyboard commands
- Appendix 2. Troubleshooting
- Appendix 3. Useful links
- Appendix 4. Optional header fields
- Appendix 5. Cancel-Key and Cancel-Lock
- Appendix 6. Browse using the space bar
- Appendix 7. Email address verification
- Appendix 8. Search and wildcards
- Appendix 9. Some tips
Appendix 1. List of shortcuts and keyboard commands
| Action | Shortcut or command | Active window |
|---|---|---|
| Check / Uncheck message(s), except ignored ones | Return | List |
| Check / Uncheck message(s), including ignored ones | ⌥ Return | List |
| Close window | ⌘ W ou Esc | All except Profile |
| Copy | ⌘ C | |
| Copy author's email address | ⇧ ⌘ A | Message |
| Copy Message-ID | ⇧ ⌘ I | Message |
| Cut | ⌘ X | |
| Delete message(s) from database | ⌘ D | List Message |
| Disable Auto-check | − | List |
| Display mode 1 - Unread messages | 1 | List |
| Display mode 2 - Read messages | 2 | List |
| Display mode 3 - All messages | 3 | List |
| Display mode 4 - Checked messages | 4 | List |
| Display Mode 5 - Last retrieved messages | 5 | List |
| Display Mode 6 - Locked messages | 6 | List |
| Display mode 7 - Kill-filed author messages | 7 | List |
| Display mode 8 - All tagged messages | 8 | List |
| Display mode 9 - All ignored messages | 9 | List |
| Enable Auto-check | + | List |
| Encode / Decode in ROT13 | ⌥ ⌘ R | Message Compose |
| Fetch news from all groups | ⌥ ⌘ K | Profile |
| Fetch news from selected group(s) | ⇧ ⌘ K | Profile |
| Kill-file / Rehabilitate the author of the selected message | ⌘ K | List Message |
| Mark all messages in the group (or groups if several groups selected in Profile) as read and unchecked | ⌘ E | Profile List |
| Mark all messages in the thread as read and unchecked | ⌥ ⌘ E | Message |
| Mark selected messages as read and unchecked | ⌥ ⌘ E | List |
| Mark selected message as read/unread | ⌘ M | List |
| Open Documentation window | ⌘ ? (≈ ⇧ ⌘ , ) |
|
| Open first checked/unread message ¹ | Space | List |
| Open selected group ² | Enter FnReturn ³ |
Profile |
| Open selected message(s) | Enter FnReturn ³ |
List |
| Open the 1st group containing checked/unread messages ¹ | Space / ⇧ Space | Profile |
| Open the last closed message in the group | ⌘ B | List Message |
| Open the selected message in the last opened window (shortcut available if at least one Message window is already open) | ⌥ Enter ⌥ FnReturn ³ |
List |
| Paste | ⌘ V | |
| Paste as quote | ⇧ ⌘ V | Compose |
| Post a new message in the selected group ² / in the open group | ⌘ N | Profile List |
| Quit MacCafé | ⌘ Q | |
| Redo | ⇧ ⌘ Z | |
| Reply to message | F | Message |
| Scroll through the text, then next checked/unread ¹ message | Space | Message |
| Search… | ⌘ F | |
| Search by M‑ID… | ⌥ ⌘ F | |
| Select all (groups, messages, message body, etc.) | ⌘ A | Profile List Windows containing selectable text |
| Send messages | ⌥ ⌘ E | |
| Send then Fetch news from all groups | ⇧ ⌘ E | |
| Show / hide the full header of the message | H | Message |
| Show pending messages | ⌥ ⌘ B | |
| Switch between Message and Header tabs | H | Search |
| Undo | ⌘ Z | |
| Unlock locked messages in the group | ⇧ ⌘ L | List |
| Unlock messages in the thread containing the selected message | ⌥ ⌘ L | List |
| Unlock selected message/locked messages from selection | ⌘ L | List |
1. Checked or unread: depends on the option chosen in Display settings 2.
2. If several groups are selected in Profile, the last group added to the selection is taken into account.
3. The combination FnReturn is reserved for keyboards without an Enter key.
| Navigating the graphic reprentation of the thread (Message) window | Shortcut |
|---|---|
| Go to the next message (on the same branch) | ▶︎ |
| Return to previous message (on the same branch) | ◀︎ |
| Go down a branch (from the first message in the branch) | ▼ |
| Return to the first message in a branch | ⇧◀︎ or Backspace |
| Go up one branch (from the first message in the branch) | ▲ |
| Go up to the message from which the branch starts (from the 1st message of the branch) | ◀︎ or Backspace |
| Return to the first message in the thread | O |
| Navigating the body of a message | Keyboard with numeric keypad | Keyboard without numeric keypad |
|---|---|---|
| Scroll up | ↑ | Fn▲ |
| Scroll down | ↓ | Fn▼ |
| Go back to top | ⤒ | Fn◀︎ |
| Go down to the bottom | ⤓ | Fn▶︎ |
Appendix 2. Troubleshooting
After importing the News archives from MacSOUP, the groups in the Profile window are grayed out, marked with a A and cannot be opened.
Cause: you forgot to get the list of groups before proceeding with the import.
Solution:
Create a second profile with the same server as in your first profile.
Get the list of groups for this second profile.
Subscribe to all the groups you were subscribed to in MacSOUP. All groups are now active and messages imported from MacSOUP appear there.
Delete the first profile that is no longer needed.
A newly retrieved message appears truncated.
Possible cause: There was a problem connecting to the server during retrieval.
Solution:
Select the message in the List window, click on the button, then click on the Reload message item (for more information about this command, see section 3ᵒ of chapter 4.02).
Open the reloaded message to check if it is complete. If it is still truncated, it is probably because it was published that way, perhaps due to a handling error on the part of the author.
Automatic retrieval causes MacCafé to crash when opened.
Possible cause: there is a connection problem between MacCafé and the active profile server.
Solution:
Force MacCafé to quit.
Press a ⇧ key when restarting MacCafé and keep it pressed until the contents of the Profile window are displayed. This will have the effect of disabling the first (and only the first) automatic retrieval, in order to prevent the crash from happening again when MacCafé is opened. You can then change profiles or check the settings of the active profile.
The title bar of a MacCafé window is hidden by the menu bar.

Cause: This is a known — and unresolved — problem with 4D applications under macOS.
Solution to move the window:
If the window is not active, click it to activate it.
With the mouse pointer still on the window, use the combination ^⌘ + click to move it.
Appendix 3. Useful links
Find updates to MacCafé and the dbFaces file, as well as the complete version history (in French).
Glossary of terms used on Usenet
Allows you to find an article based on its Message-ID. The M‑ID must be entered or pasted into the input field with its angle brackets and without the news: prefix. Example:
<r655r5$7l0$1@shakotay.alphanet.ch>
The X-Face converter cited in chapter 3.04.
Unicode Character and Encoding Converter
On this page in French, the button Cliquer pour le mode d'emploi gives access to detailed instructions for the converter (in French too).
Accès à la hiérarchie fr.* (in French)
List of servers (and other services) offering free access to the French-speaking hierarchy of Usenet (fr.* discussion groups).
Although this page is focused on the French-speaking hierarchy, most of the servers it lists distribute other hierarchies, notably those of the Big 8. However, here is another list of servers with an international focus: Sybershock NNTP Server and Forums.
Image hosting and sharing tool, without registration or advertising, based on the free Lutim software. The maximum retention period for images is 30 days (this page, like the two others below, is multilingual).
Another instance of Lutim, this time with unlimited retention.
This third instance of Lutim also offers unlimited retention.
1. See also the section 3ᵒ of chapter 3.10.
Appendix 4. Optional header fields
MacCafé offers you the possibility to add header fields to your messages:
– permanently by adding these fields in the Add custom message header fields preferences.
– occasionally when composing a message.
Here we will review the main optional header fields, explaining their sometimes very specific use.
1ᵒ Approved
The Approved field is used exclusively for posting in moderated groups. For this reason, it cannot be added permanently, as the presence of an Approved field in a message sent to an unmoderated group could result in this message being rejected by the server.
For occasional use, three scenarios should be considered depending on the type of group where you wish to publish your message:
1. The group is not moderated ⇾ Do not add the Approved field, otherwise your message will be rejected.
2. The group is self-moderated (example on the fr.* hierarchy: fr.misc.bavardages.dinosaures ⇾ You must add the Approved field with the content of your choice.
3. The group is strictly moderated ⇾ If you are not a moderator of this group, do not add the Approved field, otherwise your message will be rejected .
Therefore, when you want to publish an article on a moderated group (indicated by a M in the group list), find out more first on the type of moderation applied there (see the status of the group generally indicated in its charter).
Some servers refuse messages whose header contains the Approved field and therefore do not allow posting to self-moderated groups. For example, the server nntp.aioe.org, when still running, returned the following error message:

2ᵒ Archive
The Archive field is intended to inform news archiving sites that you want or do not want to see your own messages archived by them.
• If the content of the field is no, you indicate to the archiving sites that the message should not be archived.
• If the content of the field is yes, you explicitly agree to the archiving of your message.
Notes
• There is no guarantee that archiving sites will respect your choice.
• The Archive field can be supplemented by the X-No-Archive field. It should even be done systematically, as we cannot know whether a given archiving site respects the first, the second, both or neither of these two fields.
3ᵒ Comments
The Comments field allows you to add a comment to the header of your message. Its content is free.
4ᵒ Distribution
The Distribution field allows you to indicate to the servers the geographic/organizational area(s) in which your message should be distributed, to the exclusion of any other area. We will not detail the syntax of this field here (read RFC 5536 for more information on this subject), and we recommend that you only use it if you are completely familiar with its use.
5ᵒ Keywords
The Keywords field is intended to receive a list of keywords, separated by commas.
6ᵒ Mail-Copies-To
The Mail-Copies-To field allows you to refuse any email response to your messages. To do this, the content of the field must be: nobody (preferably never).
You can also, on the contrary, request that a copy be systematically sent to you privately. In this case, the content of the field will be either an email address that belongs to you, or — if the address of your From field is valid or if you have added a valid Reply-To field — the poster value.
Note : Compliance with these instructions is not guaranteed.
7ᵒ Organization
The content of the Organization field is free. If you do not add it to your messages, it is generally used by the news server which enters a formula of its choice.
8ᵒ Reply-To
The use of the Reply-To field is described in the Add custom message header fields preferences. If you added it in the Preferences, you can edit it directly in the Compose window. If you have not added it in the Preferences, you can add it occasionally via the button of the Compose window.
9ᵒ Summary
The Summary field is intended to receive a summary of your message; therefore, its use is rather punctual. The content of the field is free.
10ᵒ X-No-Archive
Like all 'X-' fields, X-No-Archive is an unofficial header field, which does not prevent it from being widely used. It performs the same role as the Archive field, and like the latter can be respected or ignored depending on the archiving sites. Its use is as follows:
• If the content of the field is yes, you indicate that you do not want the message to be archived.
• If the content is no, you agree to archiving.
11ᵒ X-Face
The X-Face field, explained in detail in the Add custom message header fields preferences, is subject to special treatment in these preferences. However, you can add it occasionally using the button of the Compose window. In this case, if you have defined an X-Face in the preferences, the content of the added field will replace that of the preferences for the current message.
Note : This possibility offered for the X-Face field is not available for the Face field which is more difficult to process.
12ᵒ Other fields
There are other header fields, official or unofficial, used on news. Some are managed either by MacCafé or by news servers, and these fields cannot be added by you. Others do not pose any particular concern, but their use is either very anecdotal or has fallen into disuse, and we will not mention them here.
13ᵒ Other notes and summary
Important points to remember
• MacCafé prohibits the presence of duplicate header fields. So, if you added a header field in the preferences and if you add the same field from the Compose window, the second will not be added to the first but will replace it, only for the current message.
• The optional fields Cancel and Supersedes are automatically generated by MacCafé, when you respectively request the cancellation or replacement of one of your messages. So you can't add them yourself.
• When you add an optional field, make sure that its content only contains characters present in the table of 128 ASCII characters (no accented letter, no curved apostrophe or grouped ellipsis).
Summary of optional header fields cited in this Appendix
| Field | Content | Permanent use (Preferences) | Occasional use (Compose window) |
|---|---|---|---|
| Approved | free content (self-moderation) prohibited / identity of the moderator (strict moderation) |
prohibited | only on self-moderated groups (unless you are the moderator of a group) |
| Archive | no ⇒ archiving refused yes ⇒ archiving allowed |
allowed (predefined) | allowed |
| Comments | free content | allowed | allowed |
| Distribution | see RFC 5536 | allowed | allowed |
| Keywords | list : keyword-1,keyword-2,…,keyword-n | allowed | allowed |
| Mail-Copies-To | nobody ⇒ no mail copies email address or poster ⇒ systematic copy |
allowed (predefined) | allowed |
| Organization | free content | allowed (predefined) | allowed |
| Reply-To | valid email address belonging to you | allowed (predefined) | allowed (may be either edited or added if absent at time of composing) |
| Summary | free content | allowed but not relevant | allowed |
| X-No-Archive | yes ⇒ archiving refused no ⇒ archiving allowed |
allowed (predefined) | allowed |
| X-Face | free content | specific treatment | allowed |
Appendix 5. Cancel-Key and Cancel-Lock
Cancel-Key and Cancel-Lock are header fields which respectively constitute a key and a lock intended to prevent abusive cancellation or replacement of messages.
1ᵒ Management of Cancel-Key/Cancel-Lock by MacCafé
In the mechanism used by MacCafé to ensure the security of cancellations and replacements of your messages, three elements come into play: the message identifier (the M‑ID), your pseudonym and your protection key.
A first calculation allows, from these three elements, to define the Cancel-Key of one of your messages:

and a second calculation makes it possible to obtain the corresponding Cancel-Lock:

From there, two situations are possible:
1st situation: the Cancel-Key relating to a message has been calculated by MacCafé but has not been disclosed.
In this case, to obtain the Cancel-Lock corresponding to the Cancel-Key above, you must be able to recover the triplet of elements which led to obtaining the Cancel-Key, then redo calculation 1 from this triplet to finally perform calculation 2 from the result obtained:

2nd situation: the Cancel-Key has been calculated and has been disclosed.
By applying calculation 2 to this Cancel-Key, we directly obtain the corresponding Cancel-Lock as indicated above.
MacCafé finds itself in the first situation when it wants to test whether the message opened by the user was written by him: it completely redoes the calculations (the Message-ID and the pseudonym are recovered in the message and the protection key is that of the user) and compares the final result obtained with the Cancel-Lock appearing in the message. If they match, the Cancel and Supersede commands will be available for this message. Otherwise, these two commands will be absent.
On the other hand, when a server managing Cancel-Key/Cancel-Lock (see the following section) receives a cancellation or replacement message from MacCafé, it will be in the 2nd situation since MacCafé will have published in the cancellation or replacement message the Cancel-Key which led to the Cancel-Lock appearing in the target message; the server will then calculate the Cancel-Lock from this Cancel-Key and, if the result coincides with the Cancel-Lock of the target message, the server should, except in special cases, accept the requested replacement or cancellation.
Thanks to M.V. for this explanatory text. To further study this mechanism, you can also consult the RFC 8315.
2ᵒ Servers managing the Cancel-Key/Cancel-Lock pair
Currently, there are still few servers that take into account the Cancel-Key and Cancel-Lock fields for secure cancellations and replacements, but the list is growing little by little. Here are some that offer free access to Usenet.
Note that if you are using a server that does not support Cancel-Key/Cancel-Lock but still allows cancellations and replacements, you will still be able to perform these operations on your own messages.
Appendix 6. Browse using the space bar
The possibilities offered by the space bar depend on the setting you have chosen in the Display settings 2 preferences ( Checked or Unread).
1ᵒ Browse checked messages in a group
If you chose the Checked option, Space allows you to continuously view all checked messages in the group opened, according to the following process:
A. In the active List window, Space opens the first checked message in the first thread that contains it.
B. So the Message window becomes active, and you can continue to press Space to scroll the message text to the end. Pressing Space again will then open the next checked message in the sequence, and so on.
C. When all the thread's checked messages have been read, Space closes the Message window. If the List window still contains a thread with checked messages, pressing Space will restart the process at step A for this new thread. Otherwise, the process stops.
2ᵒ Browse unread messages from all groups
If you chose the Unread option, Space allows you to continuously view all unread messages of all groups that contain them.
A. When the Profile window is active, Space opens, from the last selected group, the first next group containing unread messages. ⇧ Space forces the start to the first group in the list regardless of which one is selected.
B. The List window then comes to the foreground, and Space opens the first unread message from the first thread that contains it.
C. The Message window now becomes active, and you can continue to press Space to scroll the message text to the end. Pressing Space again will then open the next unread message in the thread, and so on.
D. When all of the thread's unread messages have been read, Space closes the Message window. If the List window still contains a thread with unread messages, pressing Space again will restart the process at step Bfor this new thread.
E. When the list no longer contains a single unread message, Space closes the List window. If the Profile window still contains a group with unread messages, Space restarts the process at step A to process this group. Otherwise, the process stops.
Appendix 7. Email address verification
Introduction
It can be very useful to check the syntax of the email addresses used in the From and Reply-To fields. A poorly formed address in the From field may cause your messages to be rejected by your news server, or cause display problems in newsreaders. As for the Reply-To field, if you put something other than an email address with the correct syntax, this can disrupt the functioning of certain newsreaders (case encountered with Thunderbird which replaced the wrong Reply-To by someone else's!).
For this verification, MacCafé uses the is_email software, written in PHP by Dominic Sayers and published under the BSD 3 license:
https://www.dominicsayers.com/isemail/
But is_email can do even more: it includes an optional DNS test, that is to say it can query the official registry domains to check if the domain of the email address exists, and if so whether it is configured for the exchange of emails or not. This is very useful for testing whether an address displayed in the header of a message can actually correspond to an existing mailbox (although, obviously, it is impossible to guarantee that it actually belongs to the author of the message ).
Good to know
• Let's remember what the structure of a correctly formed email address should be:
local-part + @ + domain
• As the DNS test is carried out online, it requires an Internet connection.
• If is_email detects a syntax error, the check stops at this error. Therefore, the DNS test, which is supposed to occur at the end of the process, does not take place. This also means that if another error is present in the address, it will only be detected after correcting the first one and launching a new verification.
When does MacCafé launch email address verification?
Email address verification occurs at different stages (consult the corresponding chapters to find out how it is implemented).
• Profile Preferences: checking user's From field address ⇾ syntax test only.
• Add custom message header fields preferences: checking user's Reply-To field address ⇾ syntax test + DNS test.
• Message window: verification upon request of the author's Reply-To address or, if this field is absent, of his From address ⇾ syntax test + DNS test.
• Message window again: automatic verification when replying to a message containing a Followup-To: poster ⇾ syntax test + DNS test.
• Compose window: checking the address of the user's Reply-To field, either when the existing field is edited, or lwhen a Reply-To field is added via the Add header field command ⇾ syntax test + DNS test.
What are the reasons for rejecting an email address?
• is_email lists all potential syntax errors: prohibited characters, missing @ sign, missing local part or domain, misplaced periods or hyphens, address or element exceeding the authorized length, etc. As soon as an error is encountered, the check stops and a description of the error is displayed.
• We have chosen to prohibit addresses whose domain consists of an IP address. Examples:
test@[255.255.255.255]
test@[IPv6:1111:2222:3333:4444:5555:6666:7777:8888]
Indeed, it appears that this type of address is frequently used for spamming and, as a result, can be filtered by certain SMTP servers.
• Likewise, addresses whose domain contains only a top level domain (TLD) are refused. Example:
test@org
This type of address has been prohibited by ICANN since 2013 and probably cannot be used for the exchange of emails. (Source : ICANN announcement.)
• The DNS test, in the cases where it is carried out, first checks whether the domain is actually registered, and if so whether it is registered in the MX (Mail Exchange) register. We therefore have two possible error diagnoses. :
- The domain is not registered.
- The domain cannot be used for email exchange.
• By default, is_email only accepts characters present in the US-ASCII table (codes 32 to 126 inclusive, see description in Wikipedia). Initially, in order to take into account the internationalization of email addresses, we considered removing this limitation. However, various tests showed us that very few newsreaders are able to manage internationalized email addresses, so we abandoned this idea.
Consequently, any address containing characters outside the US-ASCII table will be declared invalid by MacCafé.
If you absolutely need to use an IDN, you can convert it on this web page:
https://www.motobit.com/util/punycode-decoder-encoder.asp
Enter the domain name in the Input text field.
Click the To IDN >> button.
The resulting domain name is in the ToIDN: IDN representation of '[domain name]' string: field.
For example, voilà.fr will be converted to xn--voil-3na.fr. The two representations are equivalent, but only the second will be accepted by MacCafé.
• Although the comments (or spaces) placed right next to the @ sign are accepted by certain verification programs (like that of MacSOUP for example), is_email considers them obsolete and refuses them. Accordingly, the presence of such an element terminates the check and makes DNS testing impossible. We therefore chose to follow the recommendation of is_email and reject addresses containing a comment or a space just before or just after the @ sign.
Appendix 8. Search and wildcards
The 4D language allows you to use a wildcard character to refine a search criterion in the Search fields. The character designated for this use is the at sign .
In this appendix, we will review the different cases where this wildcard character can be used in MacCafé, and in what way depending on the circumstances.
1° The different forms of research
In MacCafé, search fields do not all obey the same rules.
• In certain fields, an (invisible) wildcard character is simulated at the start and end of the entered string: we will refer to this case as follows in the following sections: string.
• Other fields are of type pop-up, that is to say that a pop-up menu allows you to choose whether the searched string:
- must be at the beginning of the text ⇾ string
- must simply be contained in the text string
- must be at the end of the text ⇾ string
• The Name field allowing you to search for an encoding type in the Text encoding correction window does not accept wildcards.
2° Search for a group
a. The Groups field of the Newsgroups List
This is a pop-up type field. Here are some concrete examples of use of the wildcard character in this field, depending on the option chosen in the pop-up menu.
• Starts w/
fr.@mac ⇾ shows all groups whose name starts with fr. and contains mac.
Example results:
- fr.comp.applications.emacs
- fr.comp.os.mac-os.x
- fr.comp.sys.mac
- etc.
comp.@sys@games ⇾ shows all groups whose name starts with comp. and contains the strings sys and games in the order given.
Example results:
- comp.sys.amiga.games
- comp.sys.ibm.pc.games.rpg
- comp.sys.mac.games.misc
- etc.
Note : It is possible to get override the rule “starts with” by adding a wildcard at the start of the string. For example, @fr.@sys will display all groups containing both strings in order, regardless of whether the first one is at the beginning or not.
Example results:
- alt.fr.comp.sys.sun
- alt.fr.systemes.gps
- fr.comp.sys.mac.communication
- etc.
• Contains
sys@com ⇾ shows all groups whose name contains the strings sys and com in the order given.
Example results:
- alt.comp.sys.mac.com
- alt.sys.pc-clone.compaq
- fr.comp.sys.mac.communication
- etc.
fr.@misc@ac ⇾ shows all groups whose name contains the strings fr., misc and ac in the order given.
Example results:
- alt.fr.misc.actualite
- fr.misc.tabac
- free.fr.misc.tauromachie
- etc.
• Ends w/
comp@software ⇾ shows all groups whose name contains comp and ends with software.Example results:
- alive.computers.software
- comp.sys.next.software
- free.it.comp.freesoftware
- etc.
Example results:
- alt.fr.comp.os.ms-windows
- fr.comp.os.ms-windows
- free.virginmedia.comp.windows
- etc.
Note : It is possible to override the “ends with” rule by adding a wildcard at the end of the string. For example, fr.@comp@ will display all groups containing both strings in order, regardless of whether the first one is at the beginning or not.
Example results:
- alt.fr.comp.reseaux.wifi
- fr.comp.lang.php
- fr.soc.complots
- etc.
b. The other Groups fields
The Groups fields in the Purge, Search and Filters windows are all of type string. They work identically to the Groups field of the Newsgroups List set to Contains , and the examples given above for this mode apply to these fields.
3° Search for an author name or pseudonym
a. The Auteur field of the Search window
Here is another pop-up search box. Like other search fields, it is case insensitive and does not differentiate between accented and non-accented characters (like e/é/è/ê), which, regarding the pseudonyms of the authors, may be important.
• Starts with
re@mi ⇾ Shows all author names starting with re (or Re, Ré, rê, etc.) and containing the second string.
re@mi@va ⇾ Shows all author names starting with re (or Re, Ré, rê, etc.) and containing the two other strings in the order given.
@re@mi ⇾ Overrides the "starts with" rule and displays all names containing both strings in order, regardless of whether the first one is at the beginning or not.
• Contains
re@mi ⇾ Shows all names containing both strings in order.
re@mi@va ⇾ Shows all names containing all three strings in order.
Note : An at sign placed at the end of the string has no effect. On the other hand, placed at the start of the string, it is considered a true at sign.
• Ends with
re@mi ⇾ Shows all names that contain the first string and end with the second.
re@mi@va ⇾ Shows all names that contain the first two strings in order and end with the third.
re@mi@ ⇾ Overrides the "ends with" rule and displays all names containing both strings in order, regardless of whether the last one is at the end or not.
b. The other Author or Pseudonym fields.
These fields are found in the List windows, as well as in the Authors Filtering and DB Faces preferences. They are all of type string and work like the Author field of the Search window set to Contains.
4° The Subject field of the List windows
Like the Author field in these same windows, it is a string type field. It therefore works in the same way as the Author field.
5° The Text to search field in the Search window
In this field, the wildcard character can only be used if The words option is checked. If, on the contrary, it is The string (slow) option which is checked, any at sign entered will be considered as a real at sign that is part of the string to search.
You will find in the text box Which option to choose? in chapter 4.07 examples of searches using or not the wildcard character, depending on the option chosen.
Appendix 9. Some tips
Test MacCafé settings using export/import commands
When you have exported the settings of a database, you can reinject these settings into the same database. This allows you to test certain settings and revert to the initial settings if the changes do not suit you. For example, suppose you want to test a new display theme (colors and fonts) in your database.
Start by exporting the database settings (menu File Export settings).
Change colors and fonts in Display Settings 1 preferences.
If the result does not suit you, run the File Import settings… command, check the Preferences - Display Settings 1 line, then click Import.
You will get the colors and fonts back as they were before your test.
Create a backup profile using a second server
If you use a single server, you may not be able to access the groups you subscribe to, sometimes for an extended period of time, because that server is down or under maintenance. Adding a second server to MacCafé will allow you to access Usenet without interruption.
Create a new profile which will be your backup profile.
Assign to this profile a server other than that of the main profile (a choice of servers is offered to you in this web page).
In your backup profile, subscribe to the same groups as in the main profile.
If the server of your main profile is inaccessible, all you have to do is switch to your backup profile to be able to retrieve the group messages.
To prevent the first message retrieval of the backup profile groups from being prolonged unnecessarily, you can activate the alert in the event of exceeding a given number of messages to be collected (see the Message retrieval preferences), and only collect a small number of messages.
The benefit of a server with a long retention period
A server with a long retention time (that is, one that retains messages for a long period of time) can be useful in at least two cases.
• If you often use the search by M‑ID, you may find yourself searching for very old messages. To increase your chances of finding them, you can simply create a profile whose server has a long retention time. In the Search engines preferences, put this server at the top of the list of servers to query (of course don't forget to authorize searching on NNTP servers).
You do not need to subscribe to the groups of this server which will serve as an archive (except if you wish to save in the database some of the found messages.
• Another use of a server with a long retention period, but this time requires you to subscribe to the groups that interest you: you can create an archive database which will allow you to consult very old messages, in particular thanks to the Search window.
Be careful though, if you want to collect all the messages from your groups, the first message retrieval may be very long. Afterwards, all you have to do is update your archives by checking the groups regularly.
Create a light base
Unlike the previous tip, you may need a very light base, in order to reduce the relative slowness inherent in 'offline' newsreaders like MacCafé. A simple purge script by age (to be launched daily, once a week or once a month) will allow you to limit the retention of messages according to the duration of your choice.
Rename an existing database
To rename a database, simply rename its main file, as well as the two annex files associated with it. (In the method described below, the names given at the base are obviously only examples.)
Exit MacCafé if it is open (essential if the database to be renamed is active).
In Finder, open the folder containing the database to rename. There you will find three files with identical names (except for the extension):
- Old Name.4DD
- Old Name.4Dindx
- Old Name.Match
If you have exported the settings from this database, you will also find a subfolder named Old Name Export Settings. You will not need to rename it (you can delete it if you no longer need it, knowing that a subsequent export of the settings from the renamed database will result in the creation of a new folder named New Name Export Settings).
Rename the files making sure they have the exact same name:
- New Name.4DD
- New Name.4Dindx
- New Name.Match
If you want to open your renamed database immediately, open MacCafé by holding down the ⌥ key until the launch options dialog appears. Choose the Select another data file option, then navigate to the folder containing the database and open the file New Name.4DD.
If you recently used the database under its old name, it may still be present in the File Open recent database menu. Clicking on this now useless name will display an alert and then remove it from the menu.
Additional filter examples
In chapter 4.12. Message filters you can find several filter examples. Here are a few more… (The list may grow depending on user needs.)
• Ignoring messages with followup to a 'trash' group
Conditions:
- Followup-To | contains | junk
- Followup-To | contains | engueulades 1
Apply filter if:
At least one condition is validated.
Filter scope:
Global.
Action:
Ignore (pictogram color of your choice)
1. The second condition refers to a 'trash' group from the fr.* hierarchy. You can of course filter 'trash' groups used on other hierarchies.